• apple,  g3,  powerbook,  restoration,  vintage

    PowerBook G3 Wallstreet Technical Resources

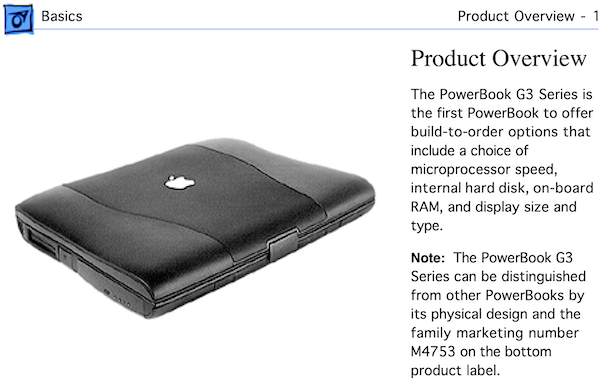
    Apple Service Source PowerBook G3 Guide, pg 11

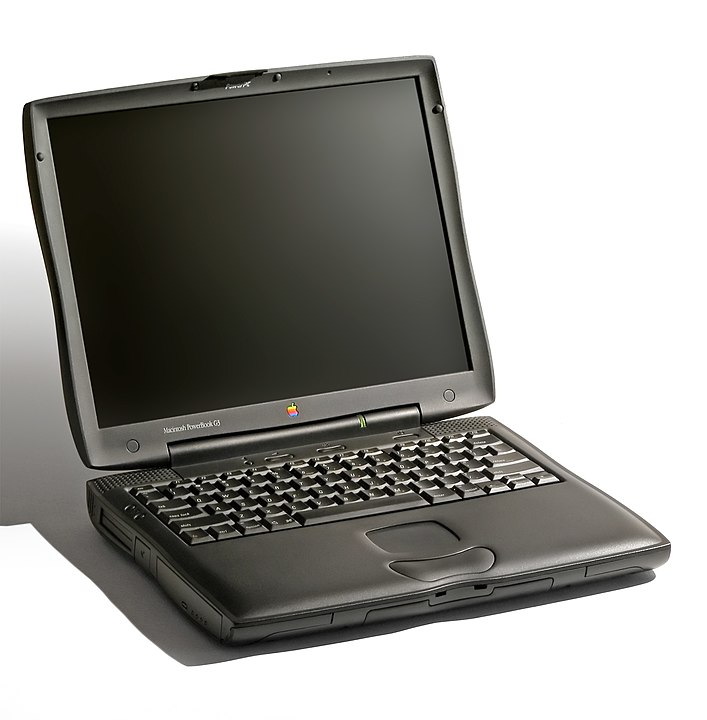
    The other day I mentioned that I was getting started one last time to try to get my 1998 PowerBook G3 up and running again. This is the third time it has failed after having replaced the Sound/AC In board (820-0986-B) and having to replace the 4GB ATA IDE OEM hard disk (and the keyboard, because I’m a klutz).

    The PowerBook G3-Series

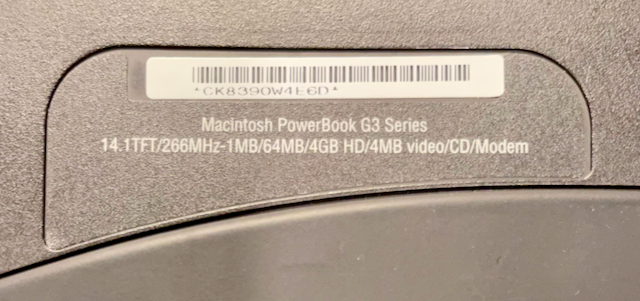
    It is important when planning your repair of a PowerBook G3 that there are multiple version of this laptop. It says so right on the bottom of the laptop – “Macintosh PowerBook G3 Series“.

    Identifying the specific version of PowerBook G3 can be a bit tricky.

    My particular PowerBook G3 is identified as being the September 1998 edition, using the code names PDQ (Pretty Damn Quick), or the one I knew it by, “Wallstreet”. According to EveryMac.com, PDQ was a refinement to the Wallstreet model to address inventory problems that Apple was grappling with at the time. Looking at the Wikipedia page for the PowerBook G3 Series, you quickly realize that there are three generations of PowerBook G3: The original Kanga version (1997) based on the earlier PowerBook 3400c, the Wallstreet models (May 1998 and September 1998), Lombard (1999) and the final revision known as Pismo (2000). Technical distinctions aside, I still plan on regerring to my particular unit as ‘Wallstreet’, since it is the style the PDQ is a descendant of.

    When verifying which vintage Mac I am working with, I like to use the excellent MacTracker application for macOS, iOS/iPadOS and the EveryMac.com website.

    Technical Resources

    Now that we can identify the particular model of Macintosh, we will need to refer to technical documentation to get a specs readout and learn how to disassemble the computer for repair.

    I like to start with the above mentioned app and website, but I do also like to look up the technical specifications of the PowerBook G3 in the Apple KB support archive.

    Another resource that I like to look up is the Apple Service Source documentation. AppleRepairManauls.com has a wide selection of technical information about Apple hardware, including the PowerBook G3 M4753 Service Source manual.

    If you are more of the get straight to what I need to know tear down kind of person, PowerbookMedic.com and iFixIt.com have Wallstreet disassembly directions. To help diagnose the problem with your Wallstreet G3, iFixIt.com has put together a troubleshooting checklist.

    Both vendors offer spare parts sales. PowerBookMedic.com also offers send in repair services, however, when dealing with computers that are over 20 years old, finding a good source of reliable replacement parts is becoming difficult to source.

    Mac OS 8 Software Disc

    Once the hardware is repaired, you may need to reinstall Mac OS. This is something that I like to do with all of my restored systems. At the time of this post, I was able to track down a restore CD on MacintoshGarden.org for the entire PowerBook G3 Series of laptops. You will need to burn the disk image .dmg file on to a physical CD before using it.

  • apple,  g3,  powerbook,  restoration,  vintage

    PowerBook G3 Rebuild

    Some time ago, I purchased a used PowerBook G3 Wallstreet laptop. I had used one at work in the early 2000s and wanted to add one to my vintage collection.

    Being over 16 years old when I purchased it, needing some work to getting it running properly again was to be expected. Shortly after purchasing it, the Sound/AC board had gone bad. I was able to source a working part and a repair guide from PowerBookMedic.com.

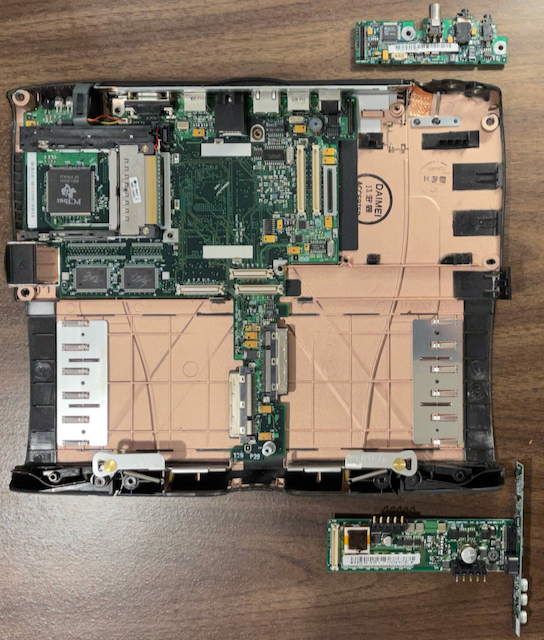
    G3 motherboard in chassis with sound/AC in board (top) and charger board (bottom).

    More time passed and the stock 4GB ATA IDE hard disk failed. I sourced another OEM part and installed it. While reassembling the G3, I accidentally broke one of the clips for the spacebar takes to a stupid mistake. Another OEM part later, the PowerBook G3 was put back together. Except, after replacing the disk drive and the keyboard, the laptop refused to power on again. And, so, the 1998 PowerBook G3 sat. And sat. And sat. Until today.

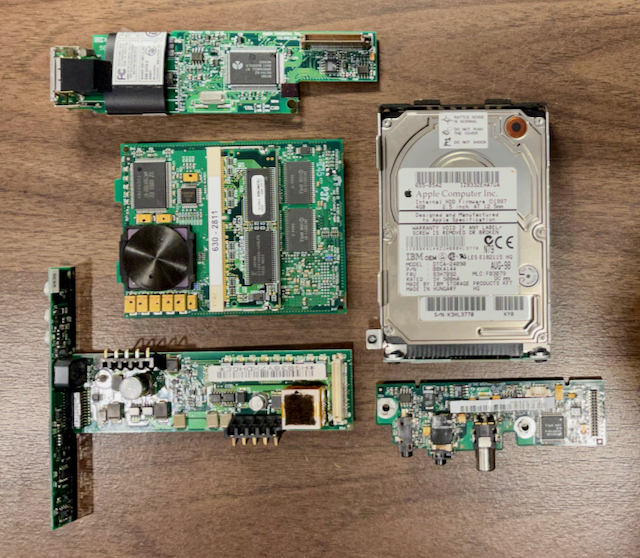
    Today, I decided to stip the unit down and look for the reason why my troublesome PowerBook refused to boot. Using the repair guide, I disassembled the 22-year old computer once again. As I removed components from the chassis there were no obvious defects. The main Lithium Ion battery pack was not swollen and did not show signs of leakage. Likewise, the motherboard, the sound/AC In board, and the charger board did not appear to have an erupted, bulging, or leaking electronic capacitors. Aside from a few soldering jobs on my eMate and Original Newton MessagePad, my knowledge of electronics is fairly limited. Still, nothing appears to be out of order.

    System components: modem (top), processor card with PowerPC CPU and RAM (center left), Apple 4GB ATA disk (center right), charger board (bottom left) and the sound/AC in board (bottom right)

    Having torn down the PowerBook and not finding any obvious defects, I am going to attempt one more round of repairs on my G3 laptop. My plan this time is to source another sound/AC In board, since it was the cause of the first failure. After having had to replace the power supply during my Power Macintosh G4 Quicksilver rebuild, I also plan on sourcing a replacement charger board.

    Since this will likely be the last time I will attempt to service my old guy, I am also thinking about options for replacing the battery pack. It will eventually leak, and I don’t want to have to deal with electrolyte damage. The G3-series PowerBooks were designed to accept two battery packs – one in each of the two module bays. I would ideally like to keep the 20x CD-ROM module in the right bay and loading in an Apple floppy disk drive or a third-party Iomega Zip Drive in the in the left module bay. As a last resort, I will look for a period accurate spacer that might be available.

    I also plan on looking into replacing the OEM 4GB ATA IDE hard disk with a 2.5″ SSD solution. I used a similar 3.5″ SATA SSD to IDE conversion kit in the aforementioned G4 Quicksilver rebuild project. It really speed up machine performance and I am hoping to do the same with the G3 Wallstreet if I can find a bridge accessory that can fit into the 2.5″ drive tray.

    It would be nice to rebuild and upgrade my G3 Wallstreet laptop. However, given it’s age and previous failures, for me, this rebuild attempt will be more about the journey than the end result. That said, if I have learned anything from NASA’s Hubble Space Telescope, launched in April 1990 and still making scientific observations today, it’s that you shouldn’t count out old hardware as long as someone is still willing to service it.

  • apple,  emulator,  newton

    Newton OS 1.0 Emulator In Your Browser

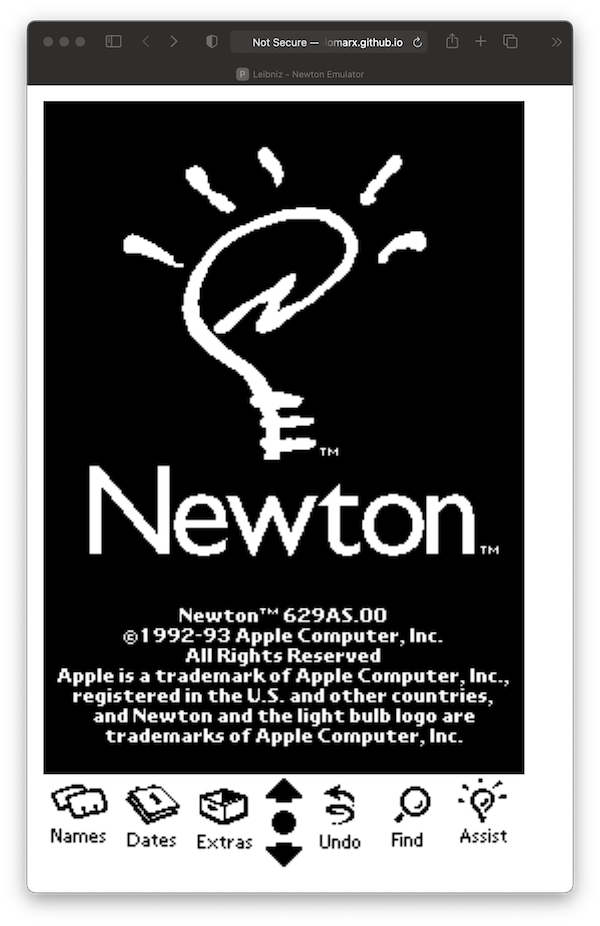
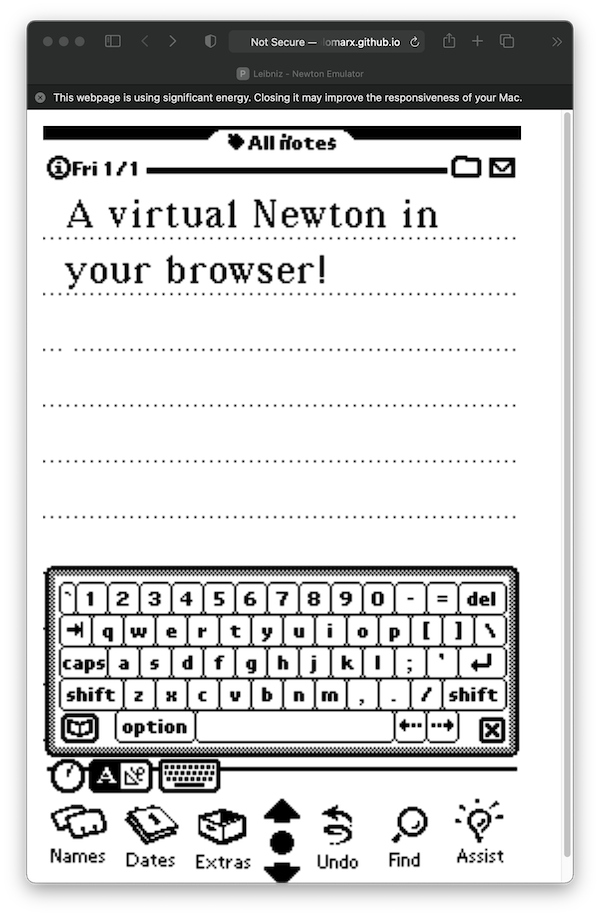
    Booting up a Newton in a browser

    I have been talking about the Apple Newton a lot lately. If you want to skip all of the soldering and just take a stroll down memory late, Pablo Marx has created a web-based Newton OS 1.0 browser-based emulator on the web called Leibniz.

    Leibniz lets you relive a stock Newton OS 1.0 playing with the software that comes bundled in ROM. The mouse pointer acts as the stylus for touch screen input. If you mouse to handwriting is as bad as mine, you can bring up the on screen keyboard and use the mouse to peck out typewritten input.

    Experience the thrill of Notes in a vNewton in your browser

    If you are so inclined, you can also download a version of the Leibniz emulator for your modern Intel or Apple Silicon Macintosh. To legally use an emulator like Leibniz, you need to dump a copy of the ROM chip from a Newton you already own. As many iin the Newton community have found, dumping your Newton ROM can be a bit of a pain, so Pablo Marx links to several ready-to-go ROM images for you.

  • apple,  messagepad,  newton,  vintage

    Patch Newton OS 1.0 to Use the Getting Started Card

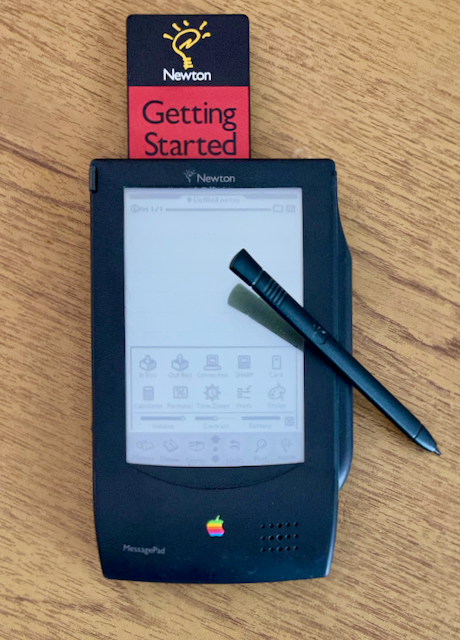
    An Original Newton MessagePad with the Getting Started PC Card

    Over the last year, I have gotten into retro computing. More specifically, restoring vintage computers to keep myself busy. Since the start of 2020, I have restored a 2001 Power Macintosh G4 Quicksilver, a 1997 eMate 300 notebook, and a 1993 Original Newton MessagePad (OMP).

    When I got my OMP, it was sold as-is, broken, and incomplete. To get the OMP working again, I just needed to put in a few hours of research, another couple of hours for electronics soldering work, and a pair of inexpensive electrolytic capacitors. I still have lots of room for improvement with my soldering skills, but as far as my OMP was concerned, the hard part was behind me. Now, it was time to find the missing pieces for my little green guy.

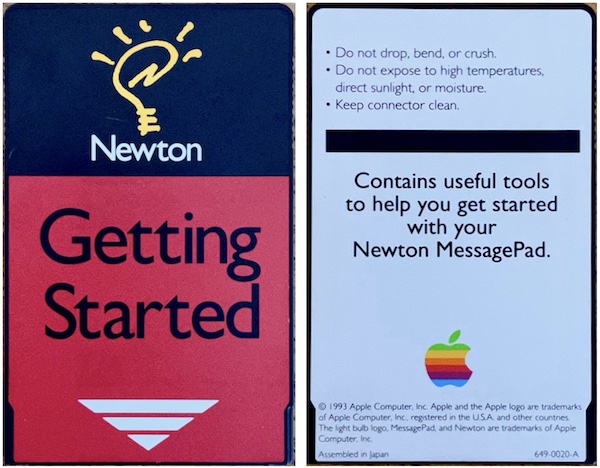
    Front and back of Apple’s 1993 Getting Started Newton Card

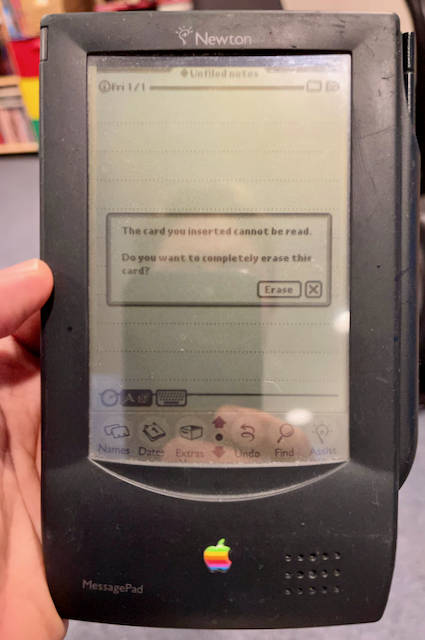
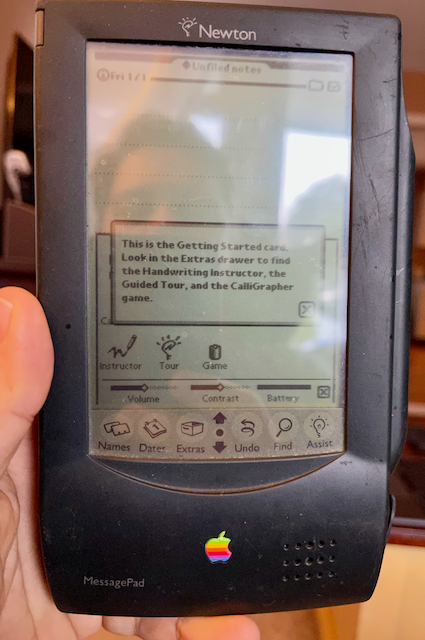
    One of the accessories that I have been searching for is an Apple Getting Started program card. After several months of searching eBay, I finally won an auction for one of these cards. These black and red credit card sized PCMCIA cards, PC Cards for short, include a few little programs that new Newton owners use can use to get to know their device better. For example, on the 1993 version of the card that I have, are the Handwriting Instructor (Instructor), Newton Tour (Tour), and CalliGrapher (Game) applications. When my card arrived, I early loaded it into my OMP. I was created with an error message that stated that the card couldn’t be read and prompted me to erase the card.

    I was not expecting this error message.

    I also tried the card in my other Newtons and my eMate and got similar results. I was starting to think that the card might be bad or the previous owner might have tried to use it for something else. Still, this is a ROM card, which can only be read, so I started to thing that my recently refurbished OMP, specifically, it’s card reader, might have been bad. So I started searching the Internet for clues.

    One real possibility was that I was jut holding it wrong 1. I started to get the hang of Newton OS 2.x and the MessasgePad 2×00, but I am less familiar with Newton OS 1.x and the 100-series MessagePads.

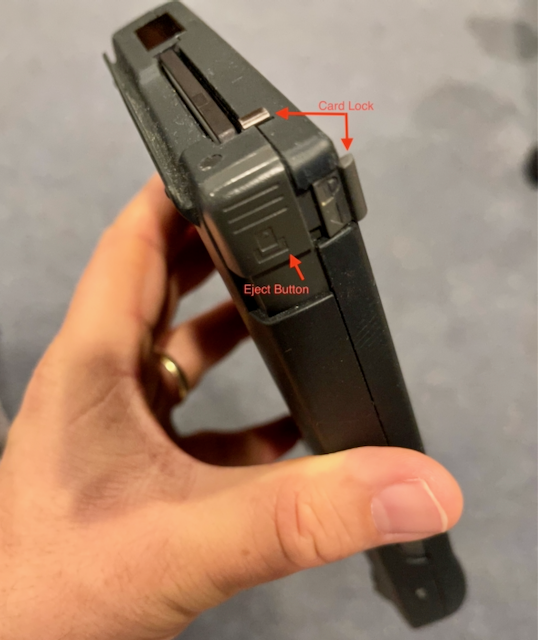
    I found a NewtonTalk.net archive that lead me to a blog post by Pawel over on his AppleNewton.co.uk blog. Pawel was having a an issue where his cards weren’t being recognized by his OMP either. Thankfully for Pawel, his solution was an easy one. Unlike the MessagePad 2×00 and eMate devices, the OMP requires that the card lock switch be re-engaged before the card can be read. But, that wasn’t my problem because I had inserted the card and engaged the card lock. So, what was my problem then?

    The OMP had a PC card lock switch in addition to the eject button.

    Fortunately, the solution to my problem was also straight forward, if not slightly more difficult to implement than flipping a slider on the OMP.

    Early Newton devices, including the OMP and it’s 100-series siblings have volatile memory in them. Unlike or iPhones or later model Newtons, when the batteries deplete, the contents of memory are lost on these old devices. To save your data from being lost, there are three ways to protect your data. The first is a backup coin cell battery in the Newton that can preserve the contents of memory while you are changing out the main battery. You can also plug-in the Newton to achieve the same effect if you don’t have a coin cell battery installed. A bold move, but some people like living life on the edge. Secondly, you can back up the contents of the Newton to a backup PC card. These cards were available from Apple and third-parities. The third option is to use the Newton Backup Utility (NBU) to save the contents of the Newton’s memory to your Classic Mac OS or Windows PC. All of this is to say that my OMP had lost the contents of RAM memory long before I received it. As a result, when I was able to finally start it up again, it had reverted to the software that was loaded into it’s ROM, which included Newton OS 1.00.

    Turning to the good folks on the NewtonTalk list lead me to the answer that Newton OS 1.00 is just too old for the Getting Started card that was included with the OMP. Matej pointed me to an old Newton FAQ that was written back in 1995 by Jean-Christophe Bousson that documented the fact that Newton OS 1.01 or later is needed to use the Getting Started card. The Newton OS 1.05 and 1.11 update packages are available for download from the United Newton Network Archive (UNNA).

    The Getting Started card needs Newton OS 1.01 or later to work.

    With the answer in hand, I turned my attention to the task of actually installing Newton 1.01. Like a fool, I read the release notes for the Newton OS 1.05 update. It specifically mentioned that users should backup your Newton before installing the update as installing any of the 1.0x updates erases your Newton. Except, I couldn’t get my OMP to backup to any of my computers. Not my vintage Power Mac G4 Quicksilver; not my iMac; and not my M1 MacBook Pro. It also didn’t matter which tool I used. Newton Connection Kit (NCK), Newton Connection Utilities (NCU), macOS Newton Connection (NCX). I decided to give up on the backup step since I didn’t have any data to save. I put NCX into Newton 1 install mode and the 1.05 update package immediately transferred to the OMP. From there, I was able to run the update without issue. Once the upgrade to Newton OS 1.05 was complete, when I loaded the Getting Started PC card into my OMP, everything worked as expected.

  • apple,  messagepad,  newton,  vintage

    Restoring a Newton MessagePad to Working Order

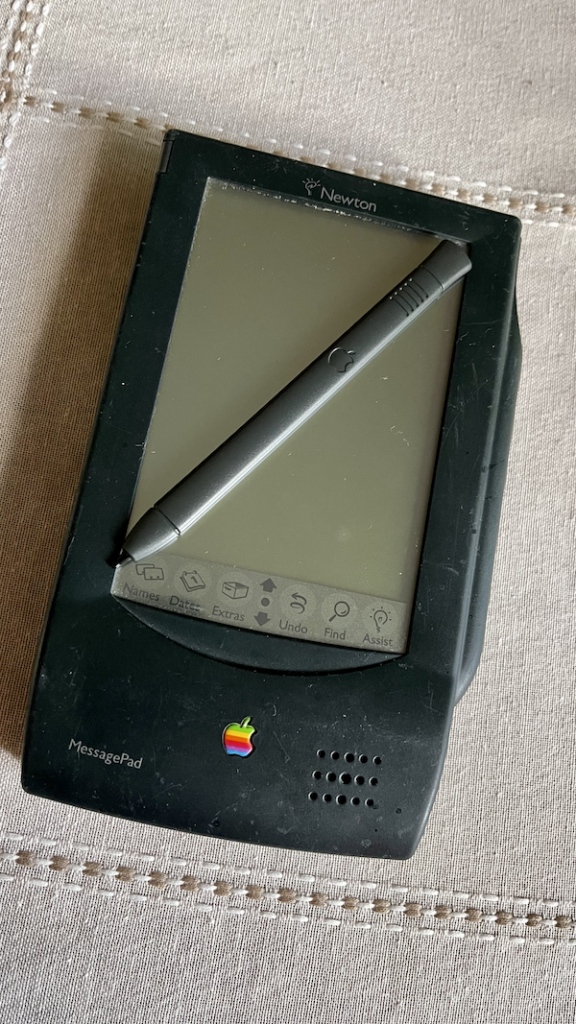
    My restored Apple Newton MessagePad (1993)

    I recently picked up an as-is Apple Newton MessagePad on eBay. I mostly wanted it for the accessories: a pair of third-party game PC cards, a 9W AC adapter, and the original Apple Mac OS (Classic) and Windows 3.5-inch floppy disks.

    When I got the Newton, I realized that it powered on, but there was no sound and the display was on but not displaying an image. As it turns out, this is a common problem with vintage Newtons and can be fixed with just a couple of new capacitors.

    To fix the original Newton MessagePad (OMP), also known as the H1000, you need a PH00 Philips head screwdriver, a spudger, a soldering iron and a small amount of solder, 1x 100µF 16V capacitor, and 1x 3.3µF 50V capacitor. I used the capacitors from the OCR 24Value 500pcs Electrolytic Capacitor Assortment Box Kit I purchased from Amazon.

    I don’t have any formal electronics training, so I relied on Colin’s This Does Not Compute video, Fixing a Common (and Inevitable) Apple Newton Problem as a general overview of the work that needed to be done. Once I had a basic idea of the repair job, I used EkriirkE’s Restoring/Repairing an Original Apple Newton MessagePad 100 (OMP H1000), start-to-finish video as a detailed repair guide.

    I hope that if you come across a Newton OMP / H1000 in a similar condition as mine, that you can use this information and repair yours also.

  • apple,  classic mac os,  emate,  newton

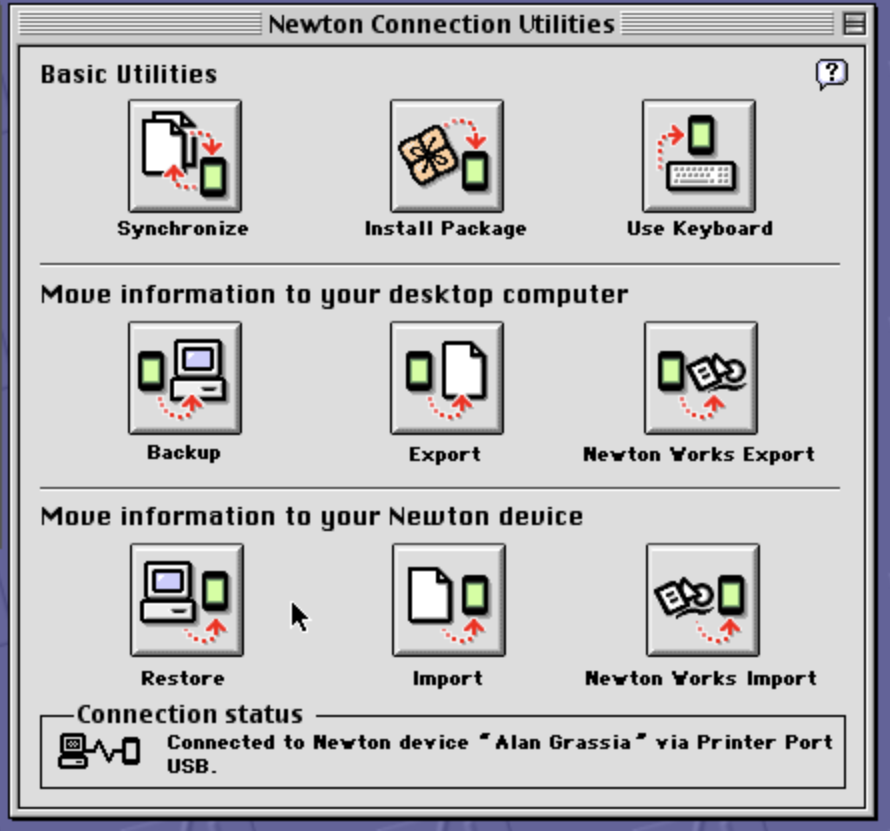
    Connecting a Newton to a Power Mac Running Mac OS 9

    Newton Connection Utilities v1.0 for Classic Mac OS 9

    This post in one of a series of posts that I am writing for retro tech and vintage Apple enthusiasts on how to use your Apple Newton MessasgePad or eMate in 2021. The collected information from these posts can be found on the SPF Newton page.

    One of the things that I have been wanting to do with my Newton OS devices, and my newfound interest in them was connect them to a vintage Macintosh using the software that shipped with them. For me, that meant getting my Newton MessagePad 2000, 2100, and eMate 300 connected to a Power Macintosh G4 Quicksilver using an Apple mini DIN 8 serial cable. Here’s what I used to my Newton OS 2.1 devices talking to my Classic Mac OS 9.2.1 Mac.

    The first thing I needed to do was get my G4 back into working condition. That was no easy task. But the Quicksilver lacks mini DIN 8 serial ports. My next task would be to track down one of USB-to-Serial adapters that were popular accessories for Mac owners who upgraded from a beige Mac with two built in mini DIN 8 serial ports to the colorful iMac G3 or later Macintosh that only had USB-A ports.

    I ended up picking up a beige Keyspan USA-28 Twin Serial to USB-A Adapter on eBay. Keyspan was later acquired by Tripp-Lite. The adapter I purchased didn’t come with the packaging, manual, or software driver. It turned out that the Keyspan USA28-GX adapter was the far more popular model, and its drivers were much easier to find. I tried using the USA28-GX Mac OS 9 driver with my USA28 adapter and I was disappointed to find out that the USA28-GX driver installer was not backwards compatible with the USA28. Thankfully, I eventually found a copy of the Mac OS 9 and Mac OS X Keyspan USA28 drivers on the archive website MacintoshGarden.com.

    With the adapter and driver situation sorted out, I needed to get the original Newton synchronization software called Newton Connection Utilities (NCU). It is important to take a moment here and call out a difference in Newton synchronization software.

    If you have a Newton OS 2.0 or 2.1 device, like I do, you need NCU. Apple-branded Newton OS 2.x devices include the MessagePad 2000, the MessagePad 2100, and the eMate 300. If you are trying to connect the original Newton MessagePad, or any of the other Apple-branded MessagePad 100-series devices, you need to use Newton Connect Kit (NCK), which all run Newton OS 1.x.

    Normally, NCU or NCK come bundled with the MessagePad or eMate on 3.5″ floppy disks or a CD. Since my second hand MessagePad 2000 didn’t come with its software or manuals, I needed to turn to Internet archives to find the installers I needed for Mac OS 9. Both NCU and NCK, as well as the Newton Package Installer and Newton Backup utilities, can be found on the United Network of Newton Archives (UNNA) repository since Apple removed the downloads from their website a long time ago.

    Once you have your adapter driver and connection software sorted, the last thing you will need is a mini DIN 8 Male to mini DIN 8 Male cable and a Newton Interconnect Adapter if you are using a MessagePad 2000 or 2100.

    To initiate the connection between the Newton and the Mac:

    1. Plug in the USB-A to mini DIN 8 seral adapter
    2. Plug in one end of the mini DIN 8 serial cable into the port 1 on the adapter
    3. Launch NCU (Newton OS 2.x) or NCK (Newton OS 1.x)
    4. In the NCU Preferences box, I checked all of the connection types
    5. Plug in the serial cable (and Newton Interconnect adapter for MessagePad 2×00)
    6. On the MessagePad or eMate, tap the Dock icon, select Serial, and tap Connect
    Success! The Newton has connected to the Mac!

    After a few seconds, if everything is in order, the Newton OS device will connect to your Mac and display the sync tools slip on the Netwon and show a Connected status in NCU/NCK.

  • apple,  dell

    A Tale of Two Batteries

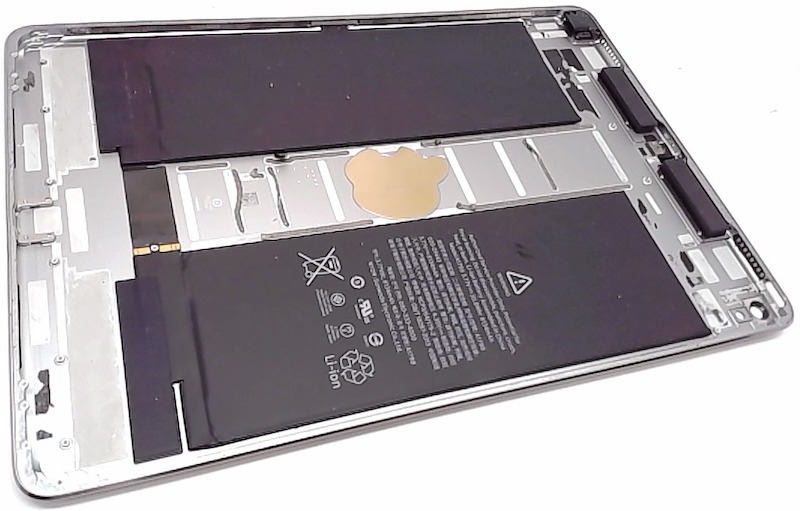
    iPad Pro 10.5-inch batteries, Source: PowerBookMedic.com

    I recently requested battery service on a Dell Latitude 7490 laptop and a 10.5-inch iPad Pro. One battery was serviced for free. I couldn’t get the other one serviced. This story does not end the way you might expect.

    The Dell Latitude 7490, released in 2018, is a business class notebook computer. Similarly, the 2017 10.5-inch iPad Pro can be considered, by way of features, a “prosumer” tablet. Recently, I had reason to call Dell and Apple for replacement battery service.

    The Latitude was purchased with a multi-year ProSupport Plus service plan for multiple years. Oddly, the optional battery replacement service only ran for years one and two. The iPad Pro on the other hand, was purchased by me without an AppleCare service plan. Why would I need one? I baby my hardware and my iPad Pro looks to be in out of the box condition except for a small scratch in the glass from a small grain of sand or table salt. (And yes, I’m still salty about it.)

    When I called in for service on the Latitude 7490 to take advantage of the battery replacement coverage, the Dell support staff kindly told me that this particular Latitude was out of its battery coverage range by about four months. I apologized for my mistake and offered to call my Dell sales representative to order a replacement battery. At this, the Dell support staff offered to replace the battery for me as if the battery service coverage had not expired. I was surprised by this and thanked the support staff. The service request was processed and a few days later I received the replacement battery. Twelve screws later, the Latitude had a new battery and was ready to go again. All-in-all, a delighted customer will continue to use Dell products in the future.

    If I have learned nothing over the last year, it is that my go to Apple product is my personal 10.5-inch iPad Pro. And while I love my Mac and use it for “real” work, my iPad Pro is the device I use most often. More than my iMac and more that my iPhone. I love reading the newspaper, watching TV and movies, and surfing the web on my iPad.

    Late last year, I started getting the feeling that my 2017 iPad Pro just was not holding a charge like it used to. I felt, without any hard evidence, that I was having to charge the iPad more frequently. Since Apple does not offer the Battery Health tool (Settings > Battery > Battery Health) on iPadOS, I was left to wonder if I was just imagining worse battery life or if I was actually getting worse battery life. During the pandemic I was using my iPad Pro more, do doubt, but I has been working at the office most days for the past 10 months.

    I downloaded and installed iMazing, a general-purpose Apple device management and IT supervision tool from a company called DigiDNA SARL based in Geneva, Switzerland. One of the claims that DigiDNA makes is that they can show you the relative battery health on an iPad. What I saw when I plugged in my iPad Pro to my iMac was not good and supported my assumption that the battery had degraded and was no longer holding a charge as well as I did when it was only a couple of years old.

    Not wanting to spend about $1,000 on a new 11-inch iPad Pro, I decided to stick it out with my current iPad Pro for another year. More recently, I decided to setup a Genius Bar appointment to have my iPad Pro’s battery swapped by Apple and continue using it for another two years before thinking about upgrading. A five-year service life for an iPad Pro feels about right to me. I backed up my device to iCloud and again with an encrypted backup using the Finder in macOS Big Sur, turned off Find My tracking, signed out of iCloud, and hard reset my iPad Pro. Then, I set up the iPad taking the generic options just to get it up to Springboard without configuring any of my settings. I made the Genius Bar appointment, and then visited my local Apple Store. So far, so good.

    When I got to the appointment, the Genius Bar person I worked with was very polite and connected their iPad to mine to run a diagnostics suite. I reiterated the comments that I put in the notes for the appointment that I was looking to do and out of warrantee battery replacement because I felt that the iPad Pro wasn’t holding a charge and it was, in my opinion, impacting the usefulness of the device. After a few minutes, the results of the diagnostics test came back – the battery was fine. What?! In November, iMazing was reporting the battery at about 78% capacity and the Apple tool was reporting the battery capacity at 89%. With the battery rating from the Apple support tool above 80%, Apple would not send the iPad out for battery service unless I paid the $449 swap fee. No, thank you!

    All of this to say that I ended up getting the exact opposite of what I was expecting. I was expecting Dell to hassle me about the out of coverage battery swap and I was expecting Apple to honor a service request to swap out the battery on my iPad that I was willing to pay the advertised price for.

    Would things have turned out differently with my experience with Apple had the ideas discussed in the recent FTC report The Fix: An FTC Report to Congress on Repair Restrictions had been implemented? I have to say, I am weary of most mall kiosk repair shops. But, had there been a repair center that offered first party authorized parts by Apple trained repair technicians, I think that in this case, I would have gladly paid $200 to have my iPad Pro serviced. Now, I use an iPad which I feel that I have to constantly charge in between every couple of uses.

  • apple,  emate,  messagepad,  newton

    Getting Started with Newton and eMate in 2021

    The Apple Newton is a family of products known as personal digital assistants, or PDAs. Later, the term grew to define a category of products that included devices such as the Palm Pilot, the Handspring Visor, the Sony Clie, and the Compaq iPaq.

    This page will talk about the hardware and software that I have assembled to get my little green assistant working with my 2015 iMac and 2020 M1 MacBook Pro. The Newton friendly version of this post can be found on the Newton page.

    The Newton Family

    Apple’s Newton family of products is made up of three types of devices: the first generation Newton MessagePad 100-series devices, or which the original Newton MessagePad is a member of; the second generation MessagePad 2000-series, and the eMate laptop specifically designed for the educational market. Digital Ocean, Harris, Motorola, Sharp, and Siemens also made licensed Newton OS devices during the Apple Newton era.

    The Newton family of products was launched in 1993 while John Scully was serving as Apple’s CEO. Scully is credited with coining the term “personal digital assistant”. The Newton family includes the following devices:

    During its five-year product run, Apple released two major versions of the Newton operating system, Newton OS 1.0 and 2.0.

    Official support for the Newton ended in 1998 when co-founder Steve Jobs returned to Apple as part of the NeXT acquisition and cancelled the product line so that resources could be reallocated to the Macintosh. Even without support from Apple, a bright and vibrant community of Newton fans are keeping the platform alive. To learn more about the creation of the Newton and fans that still use them today, I recommend that you watch Love Notes to Newton.

    Learning About Newton

    But what does it take to actually get started with using a Newton MessagePad in 2021? The answer largely depends on what you want to do with it. Assuming that you want to do more than put it on display, you are going to need manuals to help learn how to use your MessagePad or eMate.

    My Newton arrived without any manuals and only some of the in the box accessories. To get started, I found it very helpful to download .pdf copies of the manuals.

    The Newted Community has a large collection of Newton family documentation in Adobe Acrobat format. While reading the manuals, I suggest that you have your Newton device right there with you. You learn by reading, but you retain by doing. The Internet Archive website also has a number of materials that can help you learn about your Newton device.

    Still have questions? Check out the Newton FAQ. It is a fantastic resource that is broken into sections about hardware, Newton OS, software packages, and more.

    If you want to discuss all things Newton with other enthusiasts, consider joining the NewtonTalk mailing list.

    I have used all of these resources to learn about my little MessagePad 2000 PDA.

    Hardware and Accessories

    You are going to need some additional cables and adaptors to connect your vintage Newton device to a modern Macintosh. The type of Newton you have will prescribe the type of cables and adapters you will need. Below is a list of commonly used cables to connect a Newton an eMate to your computer. Keep in mind that I have not received any promotional or financial incentives/compensation for the websites linked to below. I am providing these links in the hope that you will have an easier time finding what you need than I did.

    1. Newton InterConnect Adapter 590-0756
    2. Mini DIN 8 Male to DB9 Female Serial Cable 590-0964
    3. Mini DIN 8 Male to Mini DIN 8 Male Cable 590-0977
    4. UGreen USB 2.0 to RS232 DB9 Serial Cable Male A Converter Adapter with FTDI Chipset
    5. DTECH USB to Serial Adapter Cable with RS232 DB9 Male Port FTDI Chipset
    6. Tripp Lite Keyspan USB to Serial Adapter 2 Port RS-422 Mac USB-SIO-K01M
    7. Apple USB-C to USB-A Adapter

    The type of computer you are connecting to (classic Macintosh, modern Macintosh, Windows PC, or Linux) and the ports available on that computer will dictate the exact cable ‘recipe’ that is needed to attach a Newton. The following sections give an overview of the types of cables you will need to connect to a modern Macintosh (iMac, MacBook/Pro, or Mac mini).

    NewtonSales.com has Newton InterConnect adapters and serial cables available for sale. They also have an assortment of other accessories, if needed, such as storage cards, communication cards, and replacement parts.

    eBay, local online auction sites, and computer recycling businesses in your area are also sources of used Newtons with accessories.

    Connecting to a MessagePad 2000 / 2100

    The Newton MessagePad 2×000-series devices have one data cable port, known as the Newton InterConnect Port. You will need a Newton Serial Adapter and either an Apple Serial Cable (Mini DIN 8 Male to Male) or an Apple Serial Cable (Mini DIN 8 Male to DB9), also referred to as a Windows PC sync cable. Finally, you will need to adapt the serial cable into a USB port on your Macintosh. The type of USB adapter will depend on the type of Mac that you have. The ‘standard’ USB cable used on Macintosh has a rectangular USB-A port. On MacBooks made after 2016, or the 2015 MacBook, you will need to additionally convert USB-A to USB-C, the new small rounded end cable.

    Here is the cable recipe that I use to connect my Newton MessagePad to my Macs.

    Intel iMac (2015) > #4 > #2 > #1 > Newton MessagePad 2000

    M1 MacBook Pro 13-inch (2020) > #7 > #4 > #2 > #1 > Newton MessagePad 2000

    Connecting to an Original MessagePad (OMP) / 100-series

    The Newton MessagePad OMP and 100-series devices have one data cable port, and you will need an Apple Serial Cable (Mini DIN 8 Male to Male). In addition to the serial cable, you will also need a Mini DIN 8 Male to USB-A adapter to connect the Newton to a modern Macintosh. Again, depending on which Macintosh you have, you may also need a USB-A to USB-C dongle.

    Connecting to an eMate 300

    The eMate is the only Apple Newton device, without hardware modifications, to support both the Mini DIN 8 serial cable and the Newton InterConnect port. This gives eMate owners some flexibility in which cables and adapters work best for them. The cables, adapters, and dongles used by the other Apple Newton devices will also work with the eMate 300.

    Software

    The original Newton MessagePad software is called Newton Connection Utilities written for Classic Mac OS 7.1 – 9.2 and Windows 3.1, Windows 95, and Windows NT 3.5. In 2021, you will need operating system emulation software, which is outside the scope of this primer, or replacement tools for modern macOS, Windows, and Linux operating systems.

    There are two tools modern Mac users will want to try out. The first is Newton Research Newton Connect 3.0. Newton Connection, also referred to as NCX 3, is a replacement for Apple’s Newton Connection Utilities (NCU). NCX is compatible with macOS Sierra through macOS 11 Big Sur running both Intel and Apple Silicon M1 CPUs.

    The second is NewTen, a Newton package installer written by Steven Frank. NewTen was originally written for Mac OS X 10.3 and has been tested to work on macOS 11 Big Sur running on an Apple Silicon M1 MacBook Pro (2020). NewTen can be used to install Newton software packages over serial connections. Developer Pablomarx has forked the NewTen project and can be downloaded from GitHub. The forked version of NewTen is compatible with Mac OS X 10.6 and later.

    There are likely other software tools and Newton packages that new MessagePad users will want to install, NCX 3 and NewTen 1.5.1 will be necessary to get started.

    If you are looking for additional software packages for your Newton device, the United Network of Newton Archives (UNNA) links to many websites to get new users started on their Newton OS journey.
  • apple,  bytedance,  facebook,  privacy,  tencent

    The Fight Over Asking Permission

    In a recent article posted on ArsTechnica.com titled “TikTok wants to keep tracking iPhone users with state-backed workaround”, I got the feeling that we tech nerds are going to be in for another Apple vs Developer showdown.

    Last summer, you may recall that things got a little dicey for the iPhone maker with the Hey blow up just before last year’s WWDC developers conference. The situation between Apple and Basecamp, the developer of the subscription-based Hey email service, generated backlash from the iOS developer community as well as attracting unwanted attention from U.S. law makers.

    The Ars Technica piece reports on the China Advertising Association’s efforts to develop a method for working around Apple’s new iOS and iPadOS 14 feature that requires developers to ask permission before tracking users across third-party developer apps and third-party websites with trackers built in. According to Apple, the App Tracking Transparency framework is mandatory “if your app collects data about end users and shares it with other companies for purposes of tracking across apps and web sites”.

    That’s it. That’s the whole thing. Apple wants app developers to ask for iPhone and iPad user’s permission before slurping up as much user data as possible. The sad reality is that many people will simply allow the tracking just to dismiss the message and get to their social media apps. The path of least resistance often wins.

    The one passage that caused me to raise an eyebrow was the quote from an Apple spokesperson:

    “The App Store terms and guidelines apply equally to all developers around the world, including Apple,” the company said. “We believe strongly that users should be asked for their permission before being tracked. Apps that are found to disregard the user’s choice will be rejected.”

    During last year’s congressional hearings about the power held by “big tech”, I recall Apple CEO Tim Cook saying that all developers are held to the same App Store standards. Apple included. Most of the time that is true, but we all know, in business, there is plenty of wiggle room for deals between large companies. In my opinion, the App Store Small Business Program and the reduction of the commission rate to 15% is a direct result of Apple trying to appease developers, law makers, and other state and local officials. So, a statement from Apple saying App Store guidelines apply equally to all developers seems to be true, from a certain point of view.

    The App Tracking Transparency framework will become enforced later this spring with the release of iOS and iPadOS 14.5, which is currently in beta testing.

    Personally, I am looking forward to having the additional controls that come with the App Tracking Transparency framework. It will be interesting to see how conflicts with large platform developers like Facebook, ByteDance and Tencent is resolved.