• apple,  power mac,  restoration,  vintage

    Power Macintosh 7200 Retrospective

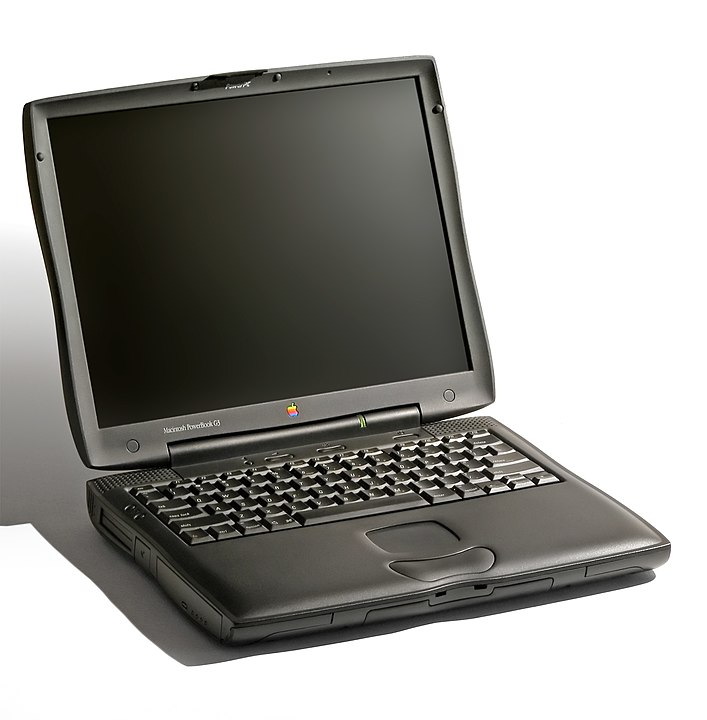
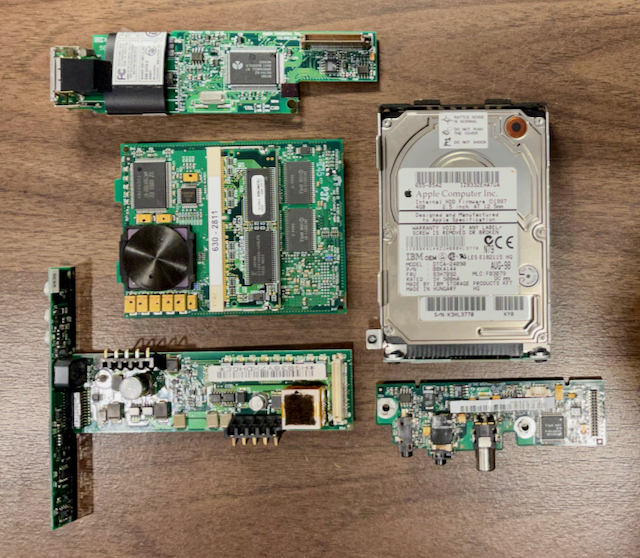
    Back in July, I started a project to repair my aging PowerBook G3 Wallstreet for a third time. I was not the original owner of this PowerBook and I had successfully completed two other repair attempts. Alas, the third time was not to be a charm and I decided to end the project.

    Apple Power Macintosh 7200/120 (1996)

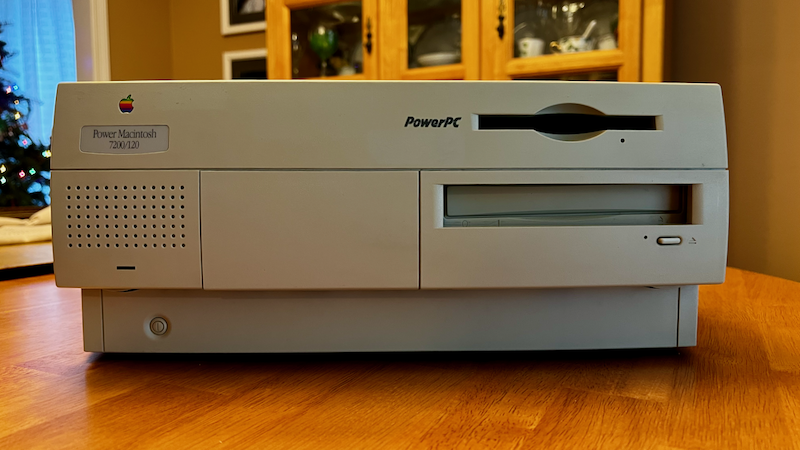
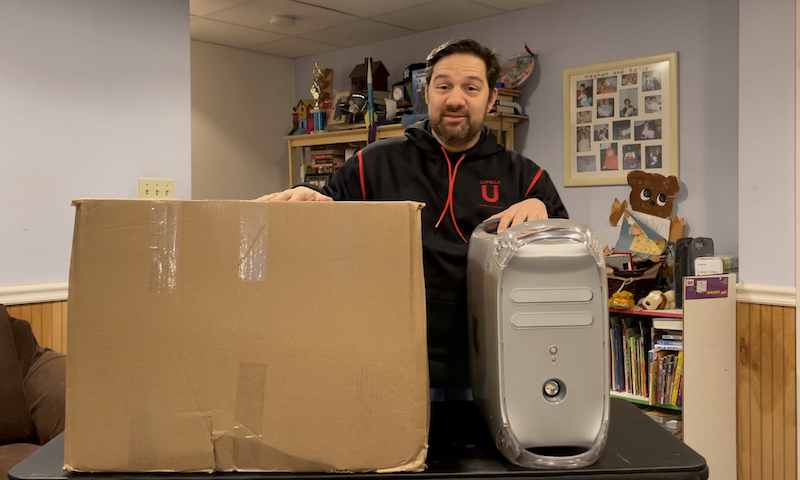
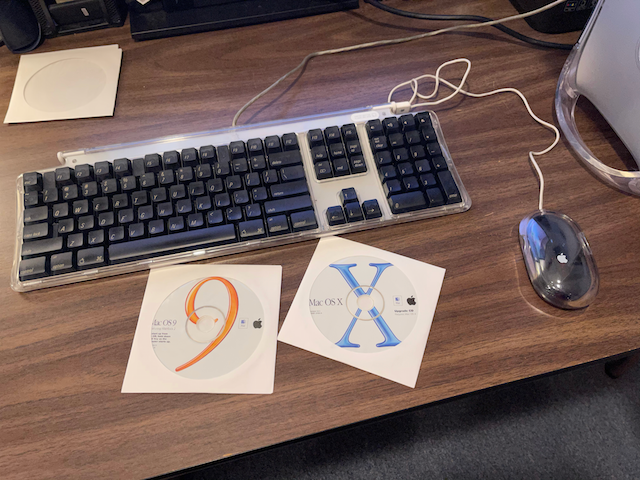
    Still wanting to have a vintage Power Macintosh with an Apple Super Drive 1.44MB floppy disk drive, I turned once again to eBay to find something to replace my Wallstreet. Enter the Power Macintosh 7200.

    Introduction of the Power Macintosh 7200

    The Power Macintosh 7200 was the low-end of a trio of new Macs that were introduced at Macworld Expo Boston in August 1995. The 7200’s siblings are the Power Mac 7500 and 8500. These machines had been released at a time when Apple needed to release speedier machines to compete with Windows NT machines running Intel Pentium processors. According to Anita Epler, writing for InfoWorld at the time, these machines offered three advantages over the previous year’s Macintosh models: fast PowerPC 601 (7200/7500) and 604 (8500) CPUs, including PCI expansion card slots over the proprietary NuBus slot, and competitive price cuts. Epler spills the codename info by stating that internally, Apple referred to this wave of Macs was “Power Surge” and included the monikers “Nitro” (8500), “TNT” (7500), and “Catalyst” (7200).

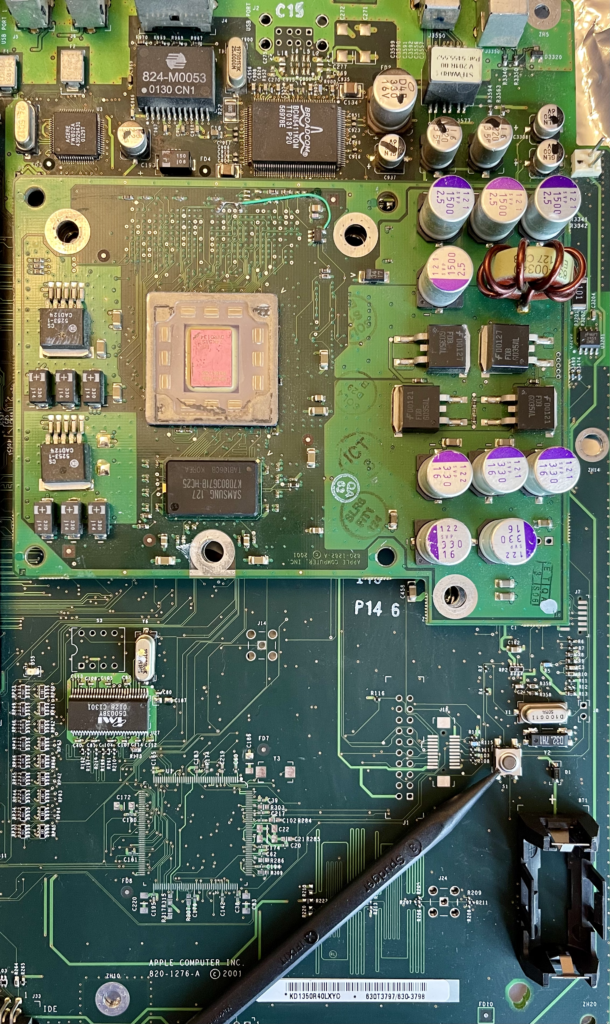
    Even as the low-cost model of the bunch, the Power Macintosh 7200 included the same design language – and parts – as the 7500, which should have made it cheaper for Apple to produce. Available in two CPU speeds, 75 and 90 MHz, the 7200 started at $1,699. The CPU was later spec bumped to 120 MHz in April 1996. In addition to the 1.44MB Super Drive floppy drive that could read/write Macintosh and MS-DOS/Windows floppy disks, customers had an option for a 4x or 8x CD-ROM optical drive and a 3.5-inch 500MB to 1.2GB SCSI hard disk. On the motherboard, which was easily accessible by way of a novel swing-out chassis, there are four 168-pin DIMM slots accepting up to 512MB of RAM. There are also four graphics memory VRAM slots, which came populated with a 1MB chip. Finally, these Macs featured a 10Base-T RJ-45 Ethernet port for a direct network connection. If you needed a different network media type, customers could either add a PCI network card or use an AAUI network adapter, such as the Farallon Etherwave transceiver. I was happy to ditch the Etherwave that I had to support on the Power Macintosh 7100. Unlike its siblings, the Power Mac 7200 lacked a processor upgrade slot.

    Looking the Power Macintosh 7200 up in Ian Page’s excellent Mactracker app (macOS and iOS/iPadOS), we see that the 7200 can run Classic Mac OS System 7.5.2, with a machine specific enabler, all the way up to Mac OS 9.1. Support for three versions of Classic Mac OS is a pretty good run, however, I wish that Apple had provided an upgrade patch to reach the last version of Classic Mac OS, v9.2 released in June 2001.

    The full Power Macintosh 7200/120 specifications are still listed on the Apple Support website.

    A Success Despite Serious Leadership Dysfunction

    In 1995, Apple was heading into serious financial trouble, and it would still be a few years before the NeXT acquisition that would bring Steve Jobs back to Apple.

    The Power Surge line of Macs were developed and released near during then Apple CEO Michael Spindler’s tenure (1993 – 1996). Tom Hormby, writing for LowendMac.com, remarks that Spindler was regarded inside Apple as “brilliant strategist” and had a great deal of success running the Apple Europe division. However, once promoted to the executive ranks, Spindler suffered from “debilitating levels of stress”. Despite the many technical and management problems Spindler faced at Apple, the PowerPC collaborative project with Motorola and IBM had come together. The Power Macintosh 7200 benefitted from the PowerPC 601 CPU that came out of that collaboration. After a disastrous performance at the annual shareholder meeting on January 23, 1996, Spindler was replaced by Gil Amelio, who would go on to start serious discussions about the NeXT ‘acquisition’ in late 1996.

    Throughout all the turmoil inside Apple in the 1990s, engineers were able to release a well performing machine. A beige box Mac that, in my opinion, includes design queues from the Macintosh SE with its grill vents alone the sides and the Mac Classic with its rounded face plate. The Power Macintosh 7200 and 7500 also featured an easy to remove case that slide off, just like the older compact Macs. Apple would continue to release beige box desktop and tower computers for a few more years until Steve Jobs and Jonny Ive would release the colorful Bondi Blue iMac with a 233 MHz PowerPC 750 G3 processor.

    Other Configurations of the 7200

    The Power Macintosh 7500 and 8500 featured a slot on the motherboard for a CPU daughter card. The purpose of this card, in part, made it possible to upgrade the Mac later on with a fast CPU. The 7200, however, lacked the modularity of the other two Power Surge machines.

    Sonnet Crescent 7200 500 Upgrade Card, source: eBay.com

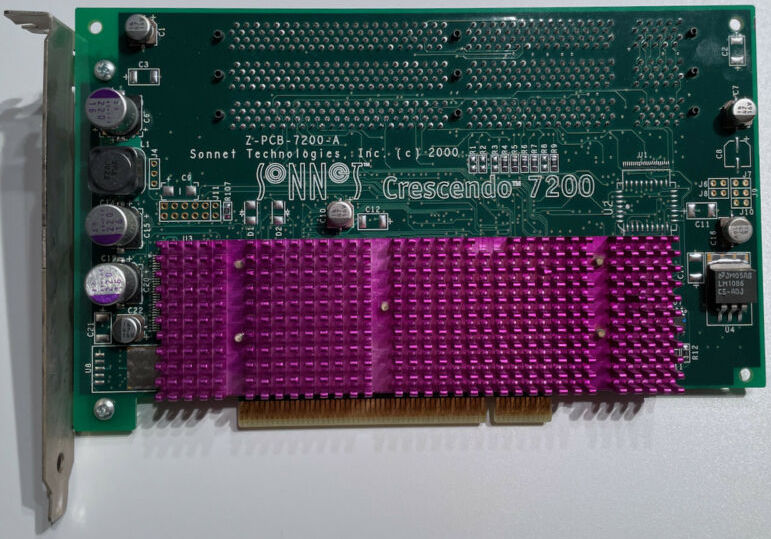
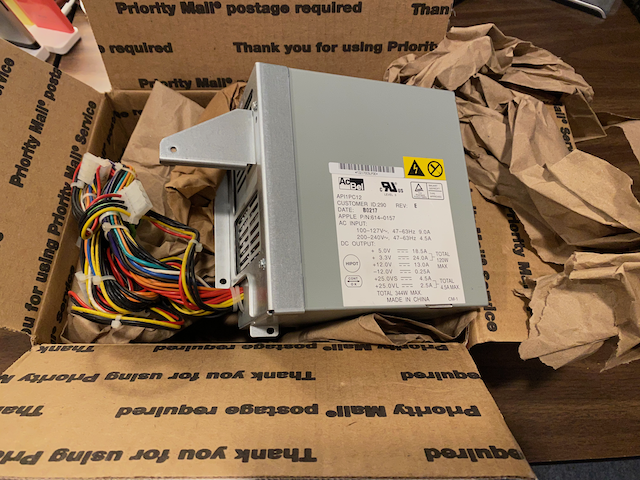
    After the PowerMac 7200 was discontinued by Apple, Sonnet Technologies developed a PCI processor upgrade board called the Crescendo/7200 G3. The Crescendo PCI board is compatible with the Power Macintosh 7200 and the Power Macintosh 8200; a tower version of the 7200 that was released in April 1996. The upgrade board includes a 500 MHz PowerPC 750 G3 CPU with 1MB of backside cache. Crescendo also came with three 168-pin DIMM slots allowing customers to upgrade to a total of 768MB when three 256MB DIMMs are installed; a significant upgrade over the 256MB RAM maximum over a stock 7200. At somepoint in my Power Macs past, one of these Sonnet cards was installed, because a Powered by Sonnet sticker was affixed to the case. The card was removed before I purchased it, so I scraped off the label with a plastic spudger.

    According to EveryMac.com, Apple also released a “PC Compatible” version of the 7200/120 that included an Intel Pentium PCI card that enabled the machine to run MS-DOS and Windows operating systems. There was also an enterprise server version of the machine, known as the Power Macintosh Workgroup Server (WGS) 7250/120. Both variants shared the same case as the Power Macintosh 7200-series desktop PCs.

    Using My Power Macintosh 7200

    The Power Macintosh that I purchased, a 7200/120 model, came with the previous owner’s applications and documents still on the hard drive.

    The Power Macintosh 7200 could run engineering applications like LemkeSoft’s CADintosh, source: LemkeSoft

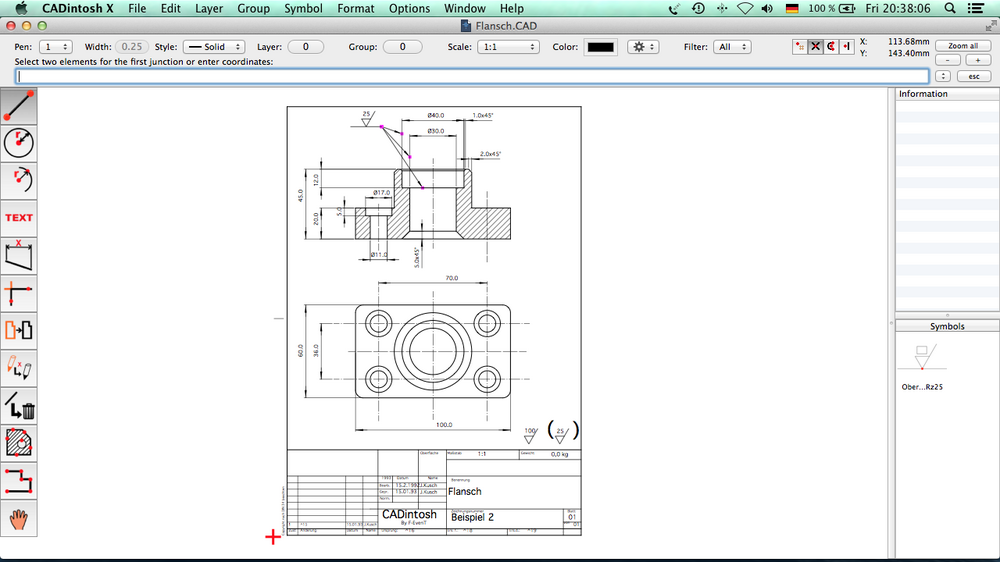
    Interestingly, it appeared that this Mac was used at a business that did engineering work based on the registered install of LemkeSoft CADintosh and the documents that I reviewed before wiping the disk drive clean and reinstalling Classic Mac OS 9.1. I had never heard of CADintosh before. Interestingly, LemkeSoft is still releasing versions of CADintosh for Intel and Apple Silicon Macs. If so inclined, you can purchase a copy of CADintosh for $32USD or $30 Euros.

    Top down view of the 7200 with the cover removed and the maintenance flaps open.

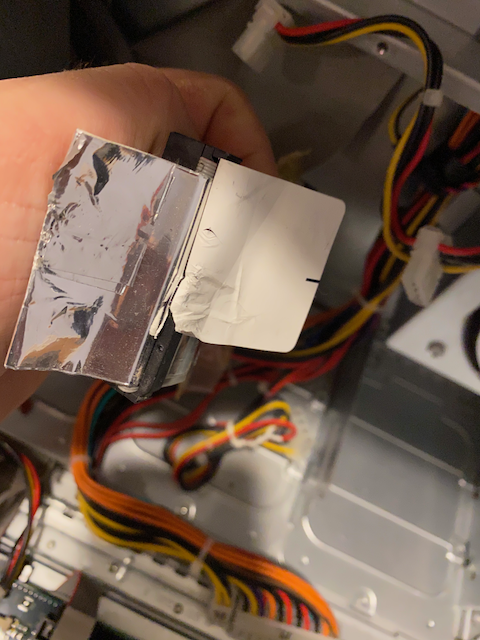
    In my experience restoring the 7200, I can atest to the speed boost of this old machine. Mac OS 9.1 feels zippy on this computer and Quantum Fireball SCSI 1.2GB hard drive doesn’t feel like the performance bottleneck that the Maxtor IDE hard drive was in my restored Power Macintosh G4 Quicksilver. I had originally planned on installing a Rabbit Hole Computing SCSI2SD v5.2 bridgeboard, but I decided to hold off for now and use the board for a Macintosh SE restoration project.

    Top down view of the 7200 with the power supply and drive bay assembly swung open, revealing the motherboard

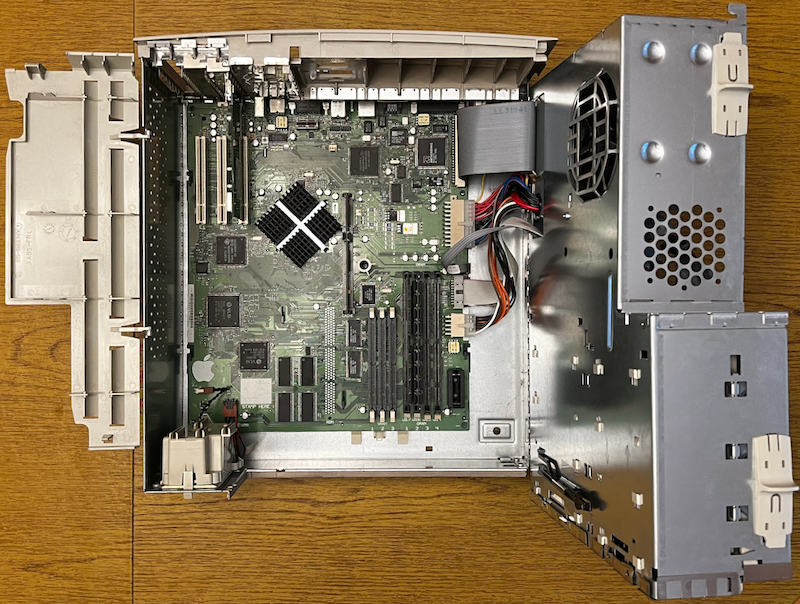
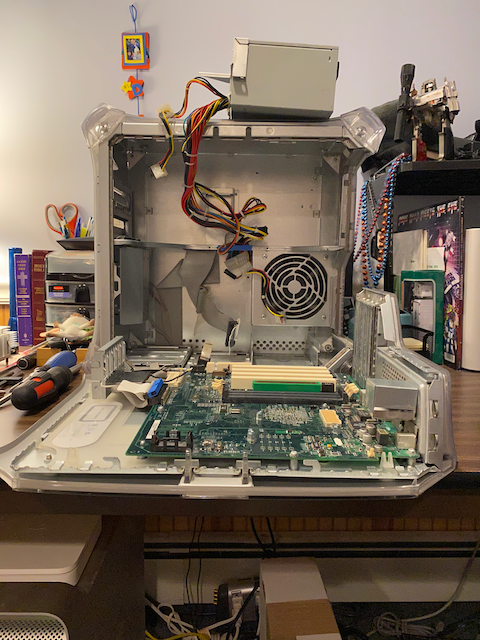
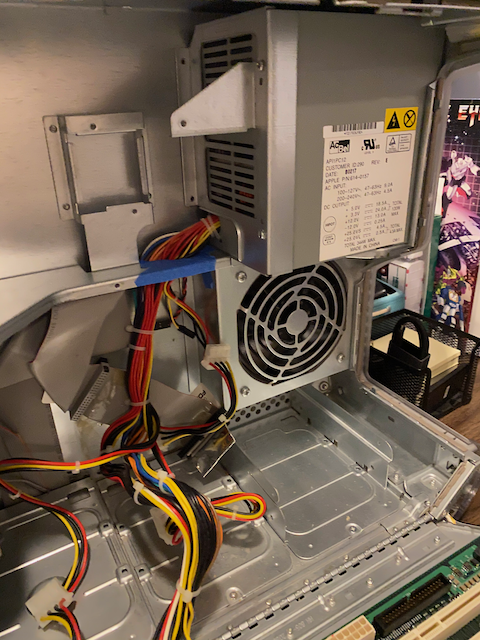
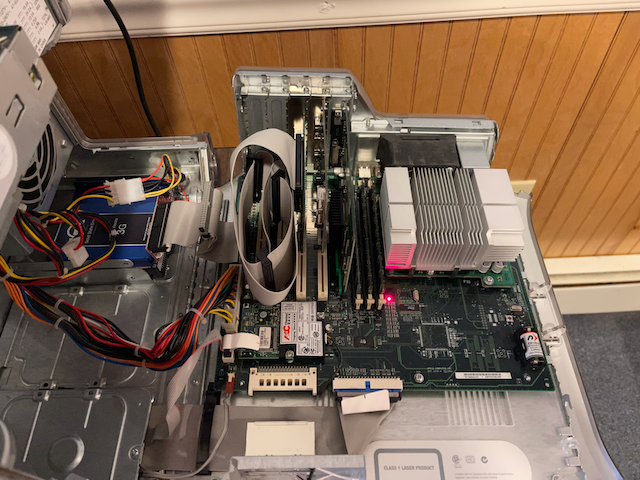
    The swing-out chassis makes the PowerMac 7200 very easy to work on. After lifting off the case over, the drive assembly swings up on the right side of the case. A narrow plastic shield over the three PCI slots swings up on the left side of the case. When both pieces are in their open postions, the motherboard DIMM and VRAM slots are directly accessible without the need for tools. This idea of swing-out chassis design would be a tentpole feature of the Power Macintosh G3, G4, G5, and original “cheese greater” Mac Pro tower cases.

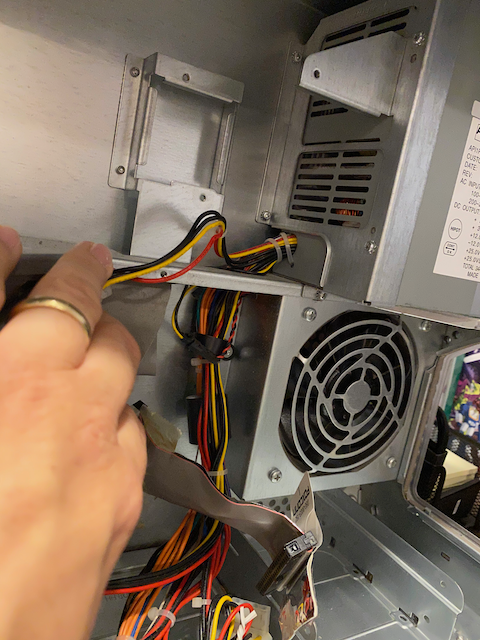
    Overall, my Power Macintosh 7200/120 is in fantastic cosmetic condition for its age and runs very well. The previous owner had installed a third-party USB 1.0 PCI card, which makes moving disk images and ISO files over to the machine from my iMac very easy. The Apple Super Drive OEM floppy drive is working remarkably well, and I haven’t had any problems coverting 800kb or 1.44MB floppy disks to image files using Disk Copy 4.2 and 6.3.3. Unlike my attempts to fix the PowerBook G3 Wallstreet, this restoration project was fairly straight forward since there were no electrical problems to troubleshoot.

    But, the Power Macintosh 7200, in hindsight, was a solid performer in a sea of beige box machines for die hard Macintosh fans that refused to use MS-DOS, Windows 95, or Windows NT Workstation.

  • apple,  g3,  powerbook,  restoration,  vintage

    Wallstreet Rebuild Project Comes to an Unsatisfying End

    Back in July, I started a new project to rebuild my PowerBook G3 Wallstreet for the third time. I’ve been working on diagnosing and testing spare parts on and off since then. I even went as far as getting a second donor machine for parts.

    In that time, I’ve become and expert in disassembling and reassembling the Wallstreet series laptops. Different RAM boards. Different CPU boards. Cleaning. Reseating. A replacement disk drive. Cleaning again. Removing the PRAM battery and letting it sit on the charger for an hour before attempting to start it up. And, yes, swapping the power in/sound board and power distribution board. Nothing worked. Several discussion threads on 68kmla.org that suggested that the G3-series of PowerBook laptops can be extremely fussy with replacement parts.

    After reading through many of the forums posts, I started thinking about trying to find a new source of spare parts on eBay or used Mac resellers. I even started thinking about trying to work out the specific technical requirements for finding compatible replacement surface mount capacitors in an attempt to replace them all.

    Recently, while scouring eBay for a second possible donor Wallstreet laptop, I ran across a listing for a Power Macintosh 7200. The 1998 Wallstreet uses a PowerPC 750 G3 CPU running at 266MHz. The slightly older PowerMac 7200 from 1995, runs on a PowerPC 601 CPU running at 120MHz. I placed a bid on the PowerMac and won it.

    At the end of the day, I’m a little disappointed in myself for not being able to restore the PowerBook G3 to working condition. I have to admit that there was a strong feeling of nostalgia that was tugging at me to get it working again since I used to use one of these notebooks early in my IT career. I felt that the PowerMac would be a suitable replacement for what I was looking for in 2021, which is an Apple Macintosh with an OEM floppy drive; one that can read 800k and 400k floppy disks so I can make disk image files for use with modern computers and emulation software. Many of my older floppy disks are old Mac System 6 and Newton software disks that I want to be able to carry forward and archive.

    So, for now, with both of my Wallstreet G3 laptops shipped off to the local recycling center, my repair effort has come to an unsatisfying end. On the bright side, the PowerMac 7200 is in fantastic condition and I am looking forward to upgrading it and installing vintage Classic Mac OS software on it.

  • apple,  g3,  powerbook,  restoration,  vintage

    PowerBook G3 Wallstreet Technical Resources

    Apple Service Source PowerBook G3 Guide, pg 11

    The other day I mentioned that I was getting started one last time to try to get my 1998 PowerBook G3 up and running again. This is the third time it has failed after having replaced the Sound/AC In board (820-0986-B) and having to replace the 4GB ATA IDE OEM hard disk (and the keyboard, because I’m a klutz).

    The PowerBook G3-Series

    It is important when planning your repair of a PowerBook G3 that there are multiple version of this laptop. It says so right on the bottom of the laptop – “Macintosh PowerBook G3 Series“.

    Identifying the specific version of PowerBook G3 can be a bit tricky.

    My particular PowerBook G3 is identified as being the September 1998 edition, using the code names PDQ (Pretty Damn Quick), or the one I knew it by, “Wallstreet”. According to EveryMac.com, PDQ was a refinement to the Wallstreet model to address inventory problems that Apple was grappling with at the time. Looking at the Wikipedia page for the PowerBook G3 Series, you quickly realize that there are three generations of PowerBook G3: The original Kanga version (1997) based on the earlier PowerBook 3400c, the Wallstreet models (May 1998 and September 1998), Lombard (1999) and the final revision known as Pismo (2000). Technical distinctions aside, I still plan on regerring to my particular unit as ‘Wallstreet’, since it is the style the PDQ is a descendant of.

    When verifying which vintage Mac I am working with, I like to use the excellent MacTracker application for macOS, iOS/iPadOS and the EveryMac.com website.

    Technical Resources

    Now that we can identify the particular model of Macintosh, we will need to refer to technical documentation to get a specs readout and learn how to disassemble the computer for repair.

    I like to start with the above mentioned app and website, but I do also like to look up the technical specifications of the PowerBook G3 in the Apple KB support archive.

    Another resource that I like to look up is the Apple Service Source documentation. AppleRepairManauls.com has a wide selection of technical information about Apple hardware, including the PowerBook G3 M4753 Service Source manual.

    If you are more of the get straight to what I need to know tear down kind of person, PowerbookMedic.com and iFixIt.com have Wallstreet disassembly directions. To help diagnose the problem with your Wallstreet G3, iFixIt.com has put together a troubleshooting checklist.

    Both vendors offer spare parts sales. PowerBookMedic.com also offers send in repair services, however, when dealing with computers that are over 20 years old, finding a good source of reliable replacement parts is becoming difficult to source.

    Mac OS 8 Software Disc

    Once the hardware is repaired, you may need to reinstall Mac OS. This is something that I like to do with all of my restored systems. At the time of this post, I was able to track down a restore CD on MacintoshGarden.org for the entire PowerBook G3 Series of laptops. You will need to burn the disk image .dmg file on to a physical CD before using it.

  • apple,  g3,  powerbook,  restoration,  vintage

    PowerBook G3 Rebuild

    Some time ago, I purchased a used PowerBook G3 Wallstreet laptop. I had used one at work in the early 2000s and wanted to add one to my vintage collection.

    Being over 16 years old when I purchased it, needing some work to getting it running properly again was to be expected. Shortly after purchasing it, the Sound/AC board had gone bad. I was able to source a working part and a repair guide from PowerBookMedic.com.

    G3 motherboard in chassis with sound/AC in board (top) and charger board (bottom).

    More time passed and the stock 4GB ATA IDE hard disk failed. I sourced another OEM part and installed it. While reassembling the G3, I accidentally broke one of the clips for the spacebar takes to a stupid mistake. Another OEM part later, the PowerBook G3 was put back together. Except, after replacing the disk drive and the keyboard, the laptop refused to power on again. And, so, the 1998 PowerBook G3 sat. And sat. And sat. Until today.

    Today, I decided to stip the unit down and look for the reason why my troublesome PowerBook refused to boot. Using the repair guide, I disassembled the 22-year old computer once again. As I removed components from the chassis there were no obvious defects. The main Lithium Ion battery pack was not swollen and did not show signs of leakage. Likewise, the motherboard, the sound/AC In board, and the charger board did not appear to have an erupted, bulging, or leaking electronic capacitors. Aside from a few soldering jobs on my eMate and Original Newton MessagePad, my knowledge of electronics is fairly limited. Still, nothing appears to be out of order.

    System components: modem (top), processor card with PowerPC CPU and RAM (center left), Apple 4GB ATA disk (center right), charger board (bottom left) and the sound/AC in board (bottom right)

    Having torn down the PowerBook and not finding any obvious defects, I am going to attempt one more round of repairs on my G3 laptop. My plan this time is to source another sound/AC In board, since it was the cause of the first failure. After having had to replace the power supply during my Power Macintosh G4 Quicksilver rebuild, I also plan on sourcing a replacement charger board.

    Since this will likely be the last time I will attempt to service my old guy, I am also thinking about options for replacing the battery pack. It will eventually leak, and I don’t want to have to deal with electrolyte damage. The G3-series PowerBooks were designed to accept two battery packs – one in each of the two module bays. I would ideally like to keep the 20x CD-ROM module in the right bay and loading in an Apple floppy disk drive or a third-party Iomega Zip Drive in the in the left module bay. As a last resort, I will look for a period accurate spacer that might be available.

    I also plan on looking into replacing the OEM 4GB ATA IDE hard disk with a 2.5″ SSD solution. I used a similar 3.5″ SATA SSD to IDE conversion kit in the aforementioned G4 Quicksilver rebuild project. It really speed up machine performance and I am hoping to do the same with the G3 Wallstreet if I can find a bridge accessory that can fit into the 2.5″ drive tray.

    It would be nice to rebuild and upgrade my G3 Wallstreet laptop. However, given it’s age and previous failures, for me, this rebuild attempt will be more about the journey than the end result. That said, if I have learned anything from NASA’s Hubble Space Telescope, launched in April 1990 and still making scientific observations today, it’s that you shouldn’t count out old hardware as long as someone is still willing to service it.

  • classic mac os,  restoration

    Apple Power Macintosh G4 Quicksilver Retrospective and Restoration

    Apple Power Macintosh G4 Quicksilver

    During July 2001’s MacWorld Expo, then Apple CEO Steve Jobs unveiled the next entrant into the fruit company’s line of professional desktop computers: the Power Mac G4 “Quicksilver”.

    The 2001 Power Mac G4 came in three configurations using the PowerPC G4 processor: 733 MHz ($1,699), 867 MHz ($2,499), and a high-end dual 800 MHz configuration ($3,499).

    Steve Jobs introduces the all-new Power Macintosh G4 Quicksilver in July 2001 at MacWorld Expo. Source: Pinterest

    In the Apple press release for the Quicksilver, Jobs remarked that:

    “These are the fastest Macs ever, with 867 MHz and dual 800 MHz PowerPC G4 processors,” said Steve Jobs, Apple’s CEO. “With the 867 MHz processor and our revolutionary SuperDrive together in a system costing just $2,499, more users can now afford to create professional quality DVDs.”

    As an IT pro, working on the Power Mac G4 tower was really nice. You knew going in that you would be able to make quick work of installing more RAM, expansion cards, or disk drives. Lift the release latch on the right side of the Mac, and you had access to all of the major components of the system. Other Macs, including the IIci, a favorite of mine, and Power Macintosh 7600, made it easy to get inside and work on, but the G4 towers were my favorite to maintain because it was so easy to get at internals.

    All of the Power Mac G4 towers kept the same exact shape and size. On the outside, the first generation mid-1999 Power Mac G4 featured darker graphite front and rear panels with lighter grey side, top, and bottom panels – borrowing a similar color scheme from the gumdrop iMac G3 special edition computers from that same time period. For 2001’s G4 Quicksilver tower, the front and rear panels were also grey, but they were a darker grey than the other panels keeping the same two-tone aesthetic as the 1999 model. The third, and final generation of G4 towers, was 2002’s Power Mac G4 Mirrored Drive Doors. As the name implies, the front panel of the 2002 G4 received a makeover, shifting the built-in speaker to the top of the chassis, sliding the new mirrored drive bay doors to the middle to make room for the four new air intake openings near the front bottom foot.

    The grey color pallet of the G4 series towers were a marked departure from the playful color schemes of the compact gumdrop iMac G3 series and 1999’s blue and white Power Mac G3 tower. The use of color would be part of Apple’s strategy to delineate personal computing appliances, like the all-in-one iMac, from the more expensive professional series of modular tower computers. This dark color scheme philosophy would carry on to the current day with Apple’s Pro products being available in muted colors including Graphite, Grey, Space Grey, Jet Black, Midnight Green, and Pacific Blue. Blue, Purple, Green, White, Yellow, Rose Gold, Coral, (PRODUCT)RED, and Silver would all be reserved for consumer products.

    In June of 2003, Apple released a spec bumped version of the Power Mac G4 Mirrored Drive Doors tower. The time of the Power Macintosh G4 line of computers was coming to a close. The 2003 G4 tower would be the last Mac capable of running Classic MacOS for business customers who needed extra time transitioning their workflows to Mac OS X. That same month, Apple introduced the all-new aluminum Power Mac G5 featuring the straight lines and flat sides that would come to dominate product designs for years to come.

    Fittingly, the Power Mac G4 would be the last Mac I would use professionally on a day-to-day basis.

    In March 2020 the COVID-19 pandemic started closing down the northeast section of the United States. With the lockdown in place, I started looking around for something to work on. Way in the back of my junk closet, I remembered that there was a G4 Quicksilver that I had rescued from the dumpster that I never got around to repairing. Making my old Power Mac run again became my lockdown project.

    Easy access to the insides of the G3 and later desktop Power Macintosh computers was a tentpole feature. I have years of experience supporting and upgrading Macs from this era. Surely, I could get inside my G4 and replace the components that were bad, right?

    When I plugged in the G4 and tried to turn it on, the computer would not boot. The fan inside the power supply would start to spin, the power button LED would come on and stay on. Inside the computer, a small red LED light lit up telling me that the system board was getting power. I figured I would start the repair with the easy fixes first. The obvious fixes of using a different power cord and different wall outlets didn’t work. Reseating RAM and PCI cards came next. Still, the result was exactly the same. Power would come on, but the Mac would not boot.

    Newly manufactured 3.6V suitable PRAM battery replacement.

    Searching Internet support forms and old Power Mac G4 service documents suggested that the PRAM battery likely needed to be replaced. This Mac was certainly old enough to need a new battery. Compatible PRAM batteries for my Power Mac are still available online from specialty Apple parts resellers and on Amazon. The first replacement battery came, and I swapped it in. For good measure, I plugged in the power cable and let the Mac sit for 30 minutes. And, again, the Mac still would not power up and boot. Attempts to reset the PRAM on the Mac as well as performing a system board reset by pressing the CUDA switch, as suggested on the iFixit forums, didn’t work either.

    Power Mac G4’s CUDA Switch

    An Apple discussion board thread listed the same tests that I did. An astute reader commented that the replacement PRAM battery wasn’t tested before installing it. And that was true, I hadn’t tested my replacement battery. I didn’t have the knowledge or tools to test it. Further, I had no idea how long my replacement battery had been sitting on a shelf. I found a second compatible battery on Amazon from a vendor who was selling new batteries. I bought a two pack. The batteries came and still the same result. I crossed PRAM batteries off my list.

    Next, I turned my attention to the power supply. I started to think that it was possible that one or more internal power supply components had failed. With no electrical engineering training at all, I started looking for sources of replacement power supplies. There are several people who sell rebuild services on the Internet. You purchase a repair service, ship them your power supply, and they will replace the internals to get it working again, and ship it back to you. I wasn’t 100% convinced that the power supply would be the root cause of my power issues, so I found a parts reseller that claimed that they sold working replacement parts.

    Getting access to the inside of G4 is easy as long as you want to access the system board. The hard drive bays aren’t too hard to get to either. Getting to the SuperDrive and the power supply are a bit more difficult.

    The upper drive chassis is right up against the power supply.

    It took some elbow grease, but I was finally able to remove the upper drive chassis and disconnect the power and data cables. It was a tight fit! As I was disconnecting the cables, I was reminded that I was not the first person to work inside this particular Mac. There was a tear in the SuperDrive cable pull tab. Not a great sign.

    The SuperDrive pull tab has been torn. Someone’s been in here before.

    I was eventually able to get the original power supply pulled out, but not before nicking one of the wires on the cutout that divides the upper and lower sections of the Mac chassis. There was no going back now, I was committed to making my replacement power supply work. Before installing the new power supply, I put some blue painters’ tape on the inside of the chassis to protect the wires from another nick while threading in the cable bundle.

    With the drive chassis removed, the power supply can be accessed.
    Blue tape helps keep from nicking the cables on the replacement power supply.
    A replacement Power Mac G4 power supply.
    Power Mac G4 waiting to have the new power supply installed.
    The new power supply, blue tape included, finally installed and ready.

    With the replacement power supply and upper drive chassis installed, I was ready to hear the Power Mac G4 start up chime. After all that, the Mac still refused to boot, but this time, the result was different. Previously, after pressing the power button, the LED light would stay lit, the fan would run, and the system board’s red LED would come on. Now, those things would only happen while I was holding the power button down. The minute I pulled my finger away, everything would stop working.

    More researching on the Internet and I found a MacRumors discussion forum thread that discussed my exact problem. Naturally, I was disheartened to think that I had another bad power supply on my hands. Reading further into the thread, commenters suggested that it could be any number of failed parts. With nothing but time on my hands in the coming months, I would set out on a journey to buy many replacement parts, including a replacement system board, a replacement processor board, and the power button control board that hides behind the face plate. I started a systematic parts swap of the components, including removing individual component parts like the SuperDrive, the hard disk, modem, RAM, and PCI cards. I figured that once the system was stripped down to the power supply, speaker, and PRAM battery, that I would at least get a sad Mac icon or a screeching tires and broken glass sound effect. Nothing worked.

    A replacement button and power LED control board that goes behind the front plate.

    I also went to the effort to scrubbing both system boards down and soaking them in 70% isopropyl alcohol. After their bath, both boards looked great, but the Mac was still refusing the boot up.

    Eventually, the repair effort got pushed to the back burner. I wasn’t able to isolate the cause of the power up issue and I started to think that I was fighting against two failed components, such as a bad power supply and a bad PowerPC CPU processor card. Spring rolled into summer and summer into fall. The Power Mac G4 could be seen out of the corner of my eye, taunting me, while working at my desk.

    In January, after the holidays had passed and things started to settle down into a pandemic normal, I found an eBay auction for an as-is Power Mac G4 Quicksilver just like mine. It was being auctioned off as part of an estate sale. The previous owner or owner’s family had removed the disk drive and RAM from the machine. It was being sold as untested. If I could win the auction at a reasonable price the shipping wasn’t going to be too expensive. I won the auction, and about a week later, my second Quicksilver arrived.

    Yes, there is another ‘as-is’ G4 in the box. No, seriously.

    As it turned out, this second Quicksilver was free from whatever was ailing my original G4. The second Quicksilver powered up, but, without a disk drive, couldn’t boot. Encouraged, I took stock of the components that I had between the two Macs. One was booting but had some body damage. The other, wouldn’t boot and was cosmetically in better shape. I was able to collect three 512MB RAM modules for a maximum RAM size of 1.5GB. I removed the VGA AGP card from the booting G4 and installed the DVI AGP card from the original Mac. I also transplanted a Belkin USB 2.0 card from the original.

    An Adaptec 2930U for Mac SCSI card has been installed to read my old SCSI disks.

    I had some old Seagate SCSI disks that I had used in a white box Windows 2000 PC that I built. Wanting to see what was on them, I purchased an Adaptec 2930U Mac card, and a new internal SCSI cable. I installed the SCSI controller and drives.

    The OWC SATA SSD to IDE upgrade kit installed and ready for Mac OS 9 and Mac OS X.

    Finally, the rebuild was coming along nicely. I pulled out a set of Power Mac G4 Quicksilver discs, which included both a Mac OS 9.2 disc and Mac OS X factory install disc set. I used the Mac OS X install disc to boot off of the SuperDrive. I discovered that previous owner of the original G4 had never wiped the disk drive. I used the Mac OS X installer disc to securely wipe the drive. I didn’t want to know anything about what might have been on that hard disk. I purchased an OWC SATA SSD to IDE conversion kit that included a new SATA SSD and accessory adapter board that is SATA on one side and IDE on the other. I booted the Mac up using the Mac OS 9.2 disc, formatted the drive, and installed the OS. Once Mac OS 9 was installed, I pulled out the Mac OS X installer disc and installed Mac OS X 10.2 Jaguar. Then 10.3 Panther. And finally, 10.4 Tiger – the latest version of Mac OS X that a PowerPC G4 Quicksilver can run. I was pretty surprised at how quickly an SSD equipped Quicksilver could boot up. Back in their hay day, the boot time was a constant complaint about these machines. My recollection was that my work G4 took forever and day to get booted up and ready for work. Clearly the IDE chain and disk drives originally used in the G4 at the time where a bottleneck.

    Testing the reassembled Power Mac G4 with the factory restore DVDs.

    With the Power Mac reassembled and buttoned up, I pressed the power button and braced for more disappointment. I was surprised to finally, after many months of work, hear the Power Mac G4 startup chime! I was up well after midnight that day getting my working Quicksilver reassembled, the hardware tuned, and software installed. It was a good thing that I was working from home the next day, as I needed to take a nap a lunchtime.

    Classic Mac OS 9.2 and Mac OS X 10.2 Jaguar install discs.

    The Power Macintosh G4 Quicksilver restoration project ended up taking much longer and costing much more than I was expecting at the outset. In the end, I am glad that I was able to see the project through. I have been learning about and exploring other vintage Apple hardware from the Newton MessagePad and eMate product lines. The dual-booting Quicksilver is an excellent bridge computer that runs Classic Mac OS and Mac OS X allowing me to work with modern .iso and disk image files .dmg and run Mac OS 9 compatible applications in the ’emulated’ Classic environment at the same time.

    This restoration was anything but simple. At least it was a fun project in the end.

    Over the last few months, the Quicksilver has been the computer I have been using to tinker with Apple’s Newton Connection Utilities, the software that is used to manage and synchronize data with a Newton MessagePad or eMate 300. And while my friends and family may not understand my obsession with computer technology that is over 20 years old, it is fun to rediscover, upgrade, and enhance yesteryear’s technology.