• apple,  homepod,  troubleshooting

    HomePod mini Troubleshooting Hijinks

    HomePod mini in colors white, blue, orange, yellow, black.

    Yes. I admit it. I bought another HomePod mini. This time, I wanted to do something very specific with it – create a stereo pair with my older HomePod mini and use that stereo pair with my Apple TV as replacement speakers when watching movies and TV shows that I purchased from the thing formerly known as iTunes.

    1

    While attempting to add my new HomePod mini to my digital home setup in the Home app, my new HomePod was getting stuck at the “Downloading” or “Configuring” stages. The other four Home Pods – two original “biggies” and two current HomePod minis – joined the Home app with no issue. But not HomePod #5. This is a common occurrence based on the Apple support forums threads and how-to explainers.

    Adding to the knowledge base that is the Internet, here is how I fixed my issue with a current generation HomePod mini (2020), iOS 17.2.1 (21C66) on iPhone 15 Pro, and Mac OS Sonoma 14.2.1.

    1. Unplug all of the Home Hub devices (HomePods and Apple TVs) in your setup except the new HomePod and the device you want to be the “active” (my word) Home Hub. You can leave other HomeKit and Matter devices like lights and thermostats connected.
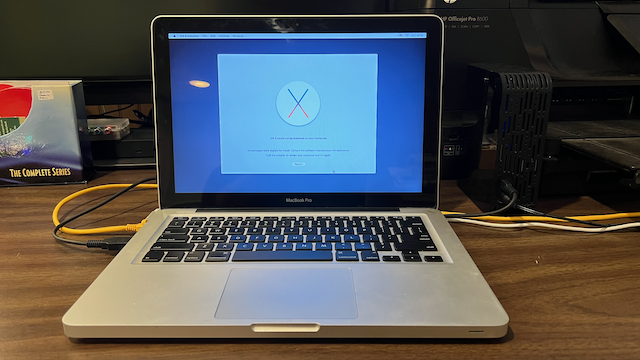
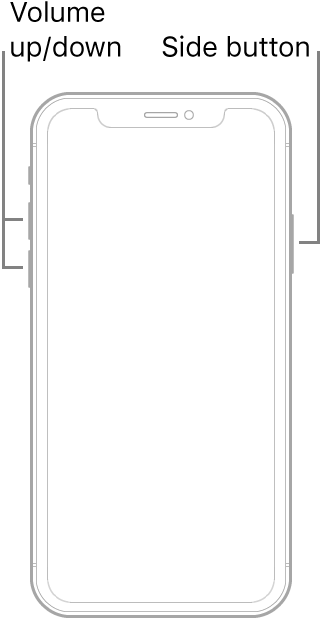
    2. Load the latest version of HomePod OS on the stuck HomePod. Depending on how your HomePod is stuck, you may need to hard reset it first. Then, connect the HomePod USB-C cable into your Mac. An orange/red light will start swirling on top of the HomePod.
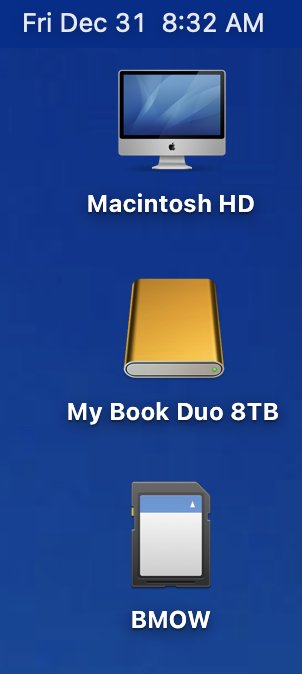
    3. After a few minutes, double-click the Macintosh HD icon on your desktop to open a Finder window. Click on the HomePod text link in the left column.
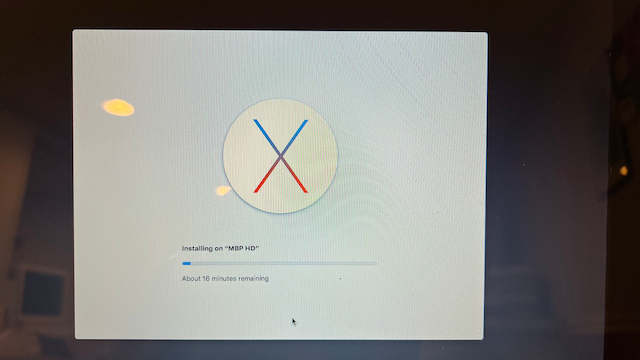
    4. Use Finder to Restore the HomePod. Full directions are available on Apple.com. In my case, the HomePod shipped with HomePod OS 15.4 (released 3/14/22) meaning my new HomePod mini was sitting on a shelf for a long time. The upgrade process to HomePod OS 17.2 took less then 10 minutes.
    5. Disconnect the HomePod after the upgrade is complete. I put my HomePod mini back on the TV stand. Unplugging and replugging in power restarted HomePod mini. I also plugged in the HomePod mini I wanted to make the other half of the stereo pair.
    6. Using my iPhone, run the HomePod setup wizard again.
    7. After a successful setup, you can then go back around your home and plug in your other Apple TVs and HomePods.

    All told, it took me six attempts and several hours to get everything setup. After creating the stereo pair “TV Pods”, I ended up having to reboot both HomePod minis, the family room Apple TV, and my iPhone 15 to get everyone on the same “page” an agree that there was in fact a stereo pair of HomePod minis called “TV Pods” made of up “Left TV Pod” and “Right TV Pod”.

    The entier process was messy and very frustrating for a day after Christmas project. In my opinion, HomePod (hardware, software), Apple TV (hardware, software), and Music (app, service) are third-class citizens after iPhone, subscription services revenue, and the Mac.

    Hopefully, this post will help save you some time and aggravation setting up your next HomePod.

  • el capitan,  mac os x,  macbook pro,  troubleshooting

    Reloading Mac OS X 10.11 El Capitan

    2012 MacBook Pro with an El Capitan install error

    I was recently given a 2012 MacBook Pro from a family member who asked me to wipe their data and recycle the computer.

    Erasing the hard disk was easy enough – I just connected it to a SATA to USB-A bridge box that I have and reformatted it from my Mac Studio.

    Where I ran into trouble was trying to load a clean install of Mac OS X 10.11.6 El Capitan on the MacBook Pro. I kept running into an error that read, in part:

    "OS X could not be installed on your computer. No packages were eligible for install."

    I tried a couple of variations on reformatting the disk from another MacBook Pro and a Windows 10 PC with no luck.

    With a Jan. 2017 date, my MacBook Pro happily installs El Capitan now

    It turns out that the date needs to be rolled back to 2017 to get the installer to run properly. Here’s how I fixed the problem:

    1. Boot the Mac from your install media. Make sure any network connections (Ethernet or Wi-Fi) are disconnected or disabled.
    2. When the OS X installer screen appears, click Utilities > Terminal.
    3. From the Terminal application, issue the command: date 0115124517
    4. The response from Terminal should be a string that reads something similar to: January 15 12:45:00 2017.
    5. Quit the Terminal app.
    6. Reconnect your network connection.
    7. Follow the on-screen prompts to complete your Mac OS X install.

    As you can see, the processed worked for me. The problem related to the El Capitan’s installation certificate has expired. As a result, the installer returns the error message about no eligible packages being available to install. When you disconnect the Mac’s network connections and roll back the date, you are ready to party like it’s 2017 and reinstall El Capitan.

  • apple,  macos,  troubleshooting

    iMac SD Card Reader Fix

    5K 27-inch iMac, Source: Apple, Inc.

    While working on a vintage Mac repair and restoration project, I had the need to write some files to a microSD card. I put the card in the full-size SD adapter and inserted the adapter with the card into my 2015 5K 27-inch iMac. Nothing happened.

    Then I remembered that it has been years since I last used an SD card in my iMac and it didn’t work then either. I take very good card of my Apple gear, so I know that I hadn’t knowingly damaged the SD card slot on my iMac.

    The macOS System Report tool was showing that the card reader was present, so it didn’t seem like there was a hardware failure.

    Maybe it is a software bug that crept in with macOS 10.15 Catalina in 2019 when 32-bit software support was dropped.

    I started searching the web for answers.

    It seems that Craig Villamor dealt with this issue all the way back in 2011. Villamor states that if an SD card does not mount to the desktop to reboot the iMac with the card still in the SD slot.

    Holy cow, that worked!

    Booting up my iMac with the SD card in the slot worked!

    Villamor suggests that inside the SD card slot on the iMac, there is a switch that is used to register that a card has been inserted and tells the Finder to mount the card to the desktop. Sometimes, that switch becomes stuck.

    Being impatient, I had already purchased a cheap-o USB-C SD Card Reader from my local Best Buy for use on my 2020 MacBook Pro. It wasn’t a total waste of money, as I don’t expect that my next iMac will have an SD Card Reader. The cheap-o reader will end up being just another dongle in my accessories bag.

  • ios,  iphone,  troubleshooting

    Force Reboot an iPhone

    My Dad has this knack for getting himself into trouble with his computer equipment. iPhones. Macs. iPads. You name it. He can find some crazy edge case that will send you searching for answers.

    To be fair, this past Friday’s problem wasn’t really something that he did wrong. He sent me a text and followed up with a call to tell me that he could’t use his iPhone 12 Pro Max. It wasn’t registering any touch input.

    Here’s the problem, he knew to reboot his iPhone by holding down the hardware Volume Up and Power buttons, but had no way to use the Slide to Power Off option.

    On ‘old style’ iPhones, like the iPhone 6/7/8-series, you can force a reboot by pressing and holding the Home button and the Power button together for a few seconds.

    That doesn’t work on an iPhone with Face ID.

    After several attempts at searching the Internet, I finally found the Apple manual page for performing a forced restart on an iPhone. The procedure varies by model depending on whether or not a Home button is present. To force restart an iPhone that has Face ID, you need to the the following:

    Press and quickly release the volume up button, press and quickly release the volume down button, then press and hold the side button. When the Apple logo appears, release the button.

    Source: Apple, Inc.

    I had to try this a few times to get the timing right, but, as ‘They’ say, the third time was the charm. Just make sure you aren’t on a phone call when you try it.

    Source: iPhone User Guide – Force Restart iPhone

  • att,  ios,  iphone,  troubleshooting,  Uncategorized

    Simple Fix for iPhone 5 Coverage Issues

    My Dad has an iPhone 5, while I’m “stuck” with a 4S until the next iPhone is released.  The iPhone 5 is a really nice upgrade if you want more rows of information on the screen.

    But over the last two weeks, my Dad has been complaining to anyone who would listen about coverage issues.  Often he would have two bars or less of cellular signal.  He even went as so far to place several calls with AT&T support and even a trip to the Apple Store Genius Bar.

    Turns out that there may not have been any problems with his phone.  The real cause may really be poor LTE coverage.  The fix for my Dad’s coverage problem was to turn off the LTE radio by setting the Enable LTE option to “Off”.

  • apple,  icloud,  ipad,  ipad mini,  iphone,  ipod touch,  troubleshooting

    How To: Back Up Your iDevice with iCloud

    I’ve always been a firm believer of running backups your important documents and other data like photos, music, and videos.

    Over the years, Apple has done a good job enhancing iCloud to automatically take care of this for you on the iPhone, iPad, and iPod touch.  With last night’s little iOS 6.1 upgrade disaster, knowing that I had a recent backup of my iPhone meant that I was only going to have to deal with the reloading my backup and not have to worry about lost photos, text messages, and all the rest.

    Here are a few quick steps to make sure you have iCloud backups turned on and how to run an immediate backup if you want to – like just before an iOS upgrade.

    Turning on iCloud Backups

    Step 1: To get started, tap on Settings from the Home screen.

    Step 2: Tap on iCloud on the Settings page.

    Step 3: Sign in to your iCloud account if you haven’t already done so.

    Step 4: Scroll down to the bottom of the iCloud page, and tap ‘Storage & Backup’.

    Step 5: Near the bottom of the page, set the ‘iCloud Backup’ option to ‘ON’.

    Step 6: Tap the ‘Back Up Now’ button at the bottom of the page to start a backup immediately.

    Bonus Points: At the very bottom of the ‘Storage & Backup’ page, will be a message telling you when the last time a successful iCloud backup was completed.

  • apple,  ios,  ipad,  troubleshooting,  upgrade

    iOS 6.1 Upgrade Loads Without Problem on My iPad 3

    For all the trouble I had installing the iOS 6.1 upgrade last night on my iPhone 4S, the same upgrade when flawlessly on my iPad 3.

    From what I can tell, it was a fluke that something when wrong on my iPhone. I’m a member of #TeamPure and I don’t jailbreak my gear so I’m really unsure of what actually went wrong.

    I’ll just chalk it up to ‘fun and excitement with technology’ and get back to using my iDevices.

  • apple,  ios,  iphone,  troubleshooting,  upgrade

    My iPhone 4S is OK, iOS 6.1 Installed

    I was annoyed this evening while untangling a failed iOS 6.1 OTA upgrade this evening.  The good news is that my iPhone is alive and well.  I did have to spend a ridiculous amount of time downloading and reinstalling iOS 6.1 via iTunes to get the iPhone out of recovery mode.
    In the end, I was able to get my iPhone working again, but after the install of the iOS 6.1 upgrade from iTunes, the iPhone is behaving like a new device.  Looks like a little while longer getting my iCloud backup restored and making sure everything truly is back to normal.
  • apple,  ios,  iphone,  sprint,  troubleshooting,  upgrade

    iOS 6.1 Upgrade on my iPhone 4S Has Just Gone BOOM! [Updated]

    Earlier today, Apple released iOS 6.1 as an 85MB OTA update for my Sprint iPhone 4S.  Sweet!  That is until I run the upgrade and my iPhone ended up in “Recovery Mode”.

    I’ll post periodic updates as I work through this issue.  The iPhone 4S is my first iPhone, I was a Palm Pre user before getting my iPhone in October 2011.  There have been a few OTA iOS updates since then, and they have all gone smoothly.  I’m not sure why this upgrade failed.  Naturally, I’m holding off upgrading my iPad 3 until I figure out what’s going on.

    If you have found yourself in the same situation, or want to learn more about Recovery Mode, check out Apple’s support page on the subject.

    Update 5 – 5:45am:

    The OTA iOS 6.1 upgrade for my iPad 3 installed without any issues.

    Update 4 – 9:00pm:

    The iOS 6.1 recovery install from iTunes 11 running on my MacBook completed successfully.  Everything is back to normal and my iPhone 4S is ready to get back to work. Crisis averted.

    Update 3 – 8:30pm:

    The iTunes 11 download for iOS 6.1 is *finally* complete and I’m about to plug my iPhone 4S into my Mac – hopefully getting this update show back on the road and my iPhone back into working condition.  It sucks as a paperweight.

    Update 2 – 7:30pm:

    Well, we’ve got about 60% of iOS 6.1 downloaded and about another 45 minutes to go.  I haven’t found any posts online yet to indicate that this is a wide spread issue.  I may just be ‘lucky’ tonight.

    Update 1 – 6:50pm:

    I’m downloading the iOS 6.1 update so I can install it on my iPhone and get it working again.  According to iTunes 11, the 920MB download will take about 85 minutes to complete the download.  Looks like it’s going to be a long night.