• apple,  apple music,  ios,  itunes,  macos

    Lyrics in Apple Music

    Why is it, that in the Year of Our Lord 2024, there are songs and albums that I purchase from Apple that do not contain the lyrics to the songs I’m listening to. On Apple Music. On my iPhone 16 Pro Max.

    What. The. Heck?

    Here’s an example. I’ve been exploring Pat Monahan’s music, both his solo albums and his work in the band Train. He’s a very talented artist and song writer. Which is why I want to read the lyrics why the song is playing.

    I recently purchased Last of Seven, the Monahan solo rock album. It’s really good and there are several tracks on that record that speak to where I am in my life right now.

    When I play the song Someday in Apple Music in iOS 18, 18.0.1 specifically, the Lyrics button is dimmed out. No reading along. Absolutely no Alan Karaoke sessions going on while I’m cleaning the house.

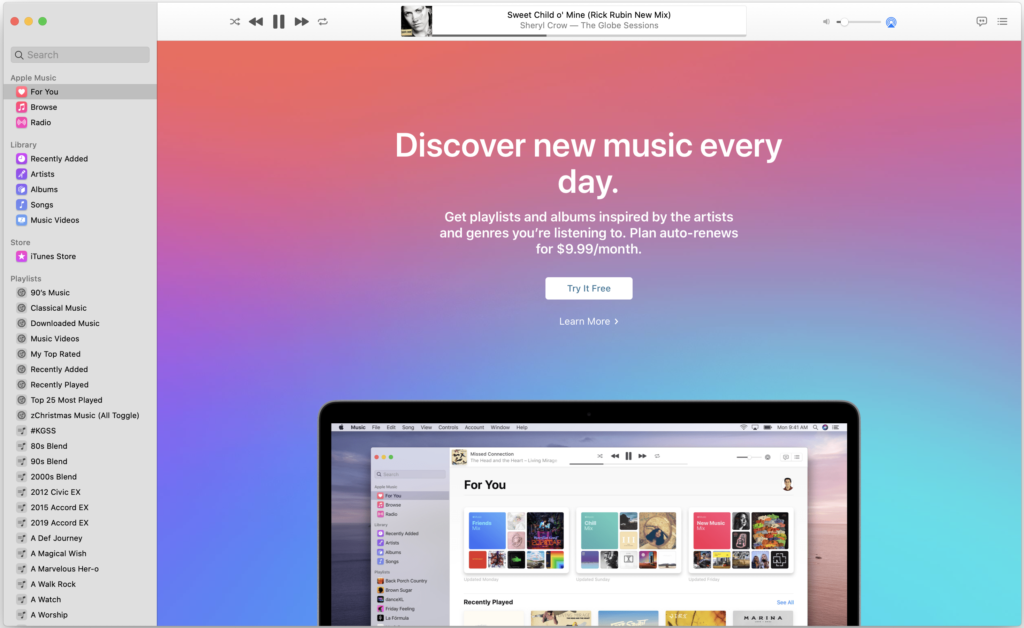
    If I switch over to my Mac Studio, with macOS Sequoia 15, Apple Music (RIP iTunes), the situation is only marginally better. Apple Music on Mac doesn’t have the lyrics either. That makes sense because the song is coming from the same source: Apple. What you can do on the Mac, however, is add custom lyrics. This has been a feature of Apple Music, and iTunes before it, for years. The process is a like “jank,” as the kids say.

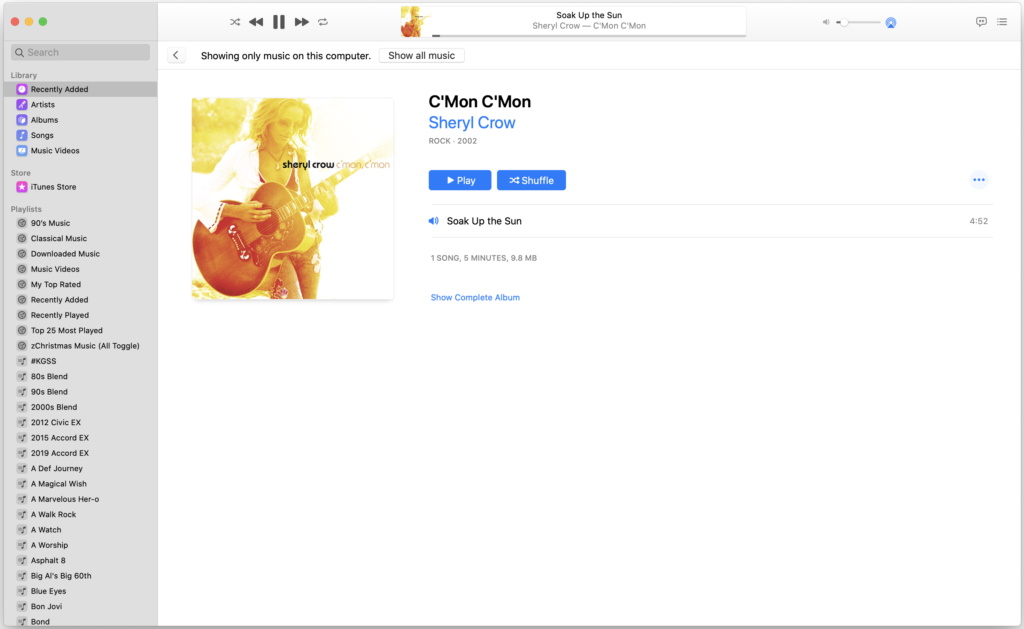
    1. Find the track in your Apple Music library on your Mac.
    2. Get Info (Command + i on your keyboard) to bring up the details.
    3. Switch to the Lyrics tab. Click the Custom Lyrics checkbox.
    4. Go to the web and search for the song lyrics.
    5. Copy the lyrics from an ad-infested sketchy website.
    6. Paste the lyrics into the Custom Lyrics box in Apple Music.
    7. Clean up any ad or tracking HTML code that was embedded in the page you copied.
    8. Click Ok to save your lyrics.
    9. Pray to the Goddess of Perpetual Maintenance that Apple actually syncs the changes.

    To be fair, for every Train track or album I have purchased to date, or any other major artist, the lyrics have been included. Well, mostly. I’m looking at you, Apple and Def Leppard. Why are the lyrics missing from Pour Some Sugar on Me from 2023’s Drastic Symphonies?!

    So, what do I want to happen? I would love Apple and the record companies to get their acts together. As an Apple One Premier customer, all song lyrics should be included. Period. That plan isn’t exactly cheap. Tim Cook loves his sweet services money. I would like to have lyrics. The same is true for purchases made in the iTunes Store app on iOS.

    But we know that Tim, Apple, and the record companies aren’t going to spend a minute on edge cases like this. So, my hope is that “Someday,” the Apple engineers working on the Apple Music app, not the service, will finally add an easy way to add lyrics to downloaded tracks on iPhone, Mac, and, yes, even the iPad. (The iPad Pro has great on-board speakers!)

    Someday.

  • apple,  itunes,  itunes store,  macintosh

    Ditching Apple Music in macOS 10.15 Catalina’s Music App

    Apple has released macOS 10.15 Catalina for Macintosh computers stretching all the way back to 2012. That’s great that Apple is still supporting those hardware platforms and newer!

    But, right from the get go, there is one thing that is driving me nuts, and that’s the end of my dear friend, iTunes. Under Catalina, iTunes 12 for macOS no longer works.

    This is the error message that appears when attempting to run iTunes 12.9.5 on macOS 10.15 Catalina.

    I knew this day was coming. Apple announced it back at WWDC in June that iTunes, after an almost 20-year run, would be replaced by Apple Music, TV, Podcasts, and Books. The iPod and iOS sync features would be transplanted from iTunes directly into the Catalina Finder. But I was still hoping that iTunes would still work. I have been using iTunes daily at least since the introduction of Mac OS X.

    With this in mind, I decided to embrace change, and I installed Catalina last night on my main 5k iMac, a 27-inch model from late 2015. On the plus side, Apple Music seems to have much better support for my two HomePods that are in a stereo pair. iTunes would often lose the connection or one HomePod would go AWOL and drop out. Music, for all it’s weird iOS influences, works well in this regard with my limited testing.

    Apple Music subscription service is in-your-face in the new Apple Music macOS 10.15 Catalina app.

    However, there is one thing that does drive me nuts. It’s the default, in-your-face promotion of Apple Music – Apple’s monthly music streaming subscription service. Call me old fashioned, but I like the idea of buying my music, “owning” it, and being able to play it off my iMac’s disk drive without having to worry about ISP bandwidth.

    To push the Apple Music subscription section out of the Apple Music sidebar, I went into Music > Preferences > Restrictions. From there, I turned on the option to Disable: Apple Music, the subscription side of things; not the iTunes-like jukebox functionality.

    Hide the Apple Music subscription service in the navigation bar for macOS 10.15 Catalina’s Music app.

    After disabling the Apple Music subscription service via preference restrictions, Apple Music gets out of the way, and show you a list that is more like the old iTunes navigation tree.

    After putting in a restriction for Apple Music, the Apple Music subscription section disappears.

    Sure, it is going to take a while getting used to the iOS-ification of the new iTunes component apps: Music, TV, Podcasts, Books, and sync. The improved HomePod streaming support and being able to get rid of the Apple Music section in the Music nav bar is a plus.

  • apple,  itunes,  macintosh,  windows

    iTunes Updated to 12.7, Slims Down

    itunes_12_7

    After yesterday’s September Event, which introduced us to the new iPhone 8, iPhone 8 Plus, and the amazing iPhone X (aka “10”), Apple released iTunes 12.7 for Mac and Windows PCs.

    itunes_software_update_12_7

    In the release notes for this update, Apple reaffirms iTunes focus on “music, movies, TV shows, podcasts, and audiobooks.”  That’s great news for me, because I use iTunes on my 5K iMac every day to listen to music while I’m working and to watch TV shows and movies that I have purchased from the iTunes Store.

    itunes127_macos_first_launch.png

    However, Apple is dropping support for some iOS device content management features.

    “If you previously used iTunes to sync apps, books, or ringtones to your iOS device, use the new App Store, iBooks, or Sounds Settings on iOS to redownload them without your computer.”

    This change should not be unexpected.  iOS devices, including the iPod touch, the only surviving iPod at this point, has had the same “I can get it from the Store myself” that iPhones and iPads enjoy.  Yesterday’s slimming down of iTunes is a welcomed change that gets rid of some of the cruft that has built up in iTunes over the last few years.

    For more details, visit the Apple Support website.


  • apple,  apple watch,  iphone 7,  iphone 7 plus,  itunes,  upgrade

    Notes on iPhone 7 and iPhone 7 Plus Upgrade Process

    Update: Friend of the blog Mike C called me out for not mentioning that Bluetooth devices also need to be paired with your new iPhone after performing an iTunes or iCloud backup restore.  That oversight has been corrected below.

    Congratulations on getting your new iPhone 7 or iPhone 7 Plus!

    Now that you have your brand new iPhone it’s time to upgrade from your old one.  While the process will vary from person to person, I have come up with a list of six steps to make the transition as smooth as possible.

    Step 1: Unpair your Apple Watch.

    The Apple Watch is a great tool for notifications, fitness tracking, taking a quick phone call or sending a dictated text message.  To ensure all of your data stays intact while moving over to your new iPhone, unpair it from your current iPhone.  Doing so backs up your Watch data to your iPhone.  To help, Apple has posted a support article called Unpair your Apple Watch and iPhone to help you navigate the process.

    Step 2: Backup your current iPhone with iTunes.

    When you use the latest version of iTunes on your Mac or Windows PC to create an encrypted local backup, iOS will also backup sensitive data including fitness and activity data and email account passwords.  Using iTunes to create an encrypted local backup of your iPhone is a different process that the nightly iCloud backups you are probably already doing.  To refresh yourself on how to use iTunes to backup an iPhone, look at Apple’s How to back up your iPhone, iPad, and iPod touch support article; specifically the “Use iTunes” section.

    When you run an encrypted backup, you also preserve your Apple Watch data in the process, allowing you to restore your data to Apple Watch later on.

    Make sure that you write down your encrypted iTunes backup password!

    Step 3: Power off your old iPhone.

    At this point, I like to put my old iPhone into airplane mode.  The point is that your old iPhone should not have network access.

    Step 4: Power on your new iPhone and follow the on-screen prompts to complete the initial setup.

    This step assumes that you are activating your iPhone at home.  If you purchased your iPhone at a retail location and a well-meaning sales associate tried to setup your iPhone you may have a different experience.

    Step 5: When prompted, select the option to restore your iPhone data from an iTunes backup.

    At this time, select the option to restore from an iTunes backup and connect your iPhone to your Mac or Windows PC.  I like to have iTunes already launched before connecting the iPhone for restoration.  In iTunes, select the backup you performed in Step 2 as the one to be restored to your new iPhone.

    Step 6: Sit back and have a refreshing beverage of choice, following any iPhone and/or iTunes prompts to complete the restore.

    For me, this is the hardest part about getting a new iPhone – the waiting for all of the data to transfer from my Mac to my new iPhone!  Be patient.  It can take a long time to restore your data.  One the restore is done, take a look around to make sure everything is working normally.

    Step 7: Pair your Apple Watch to your new iPhone.

    When you start the pairing process, you will be prompted to restore your Apple Watch data from a backup. Select the backup that was created as part of Step 1 to restore all of your health and activity data.

    Miscellaneous Odds and Ends

    Here are some things to consider doing after you have completed your iPhone upgrade.

    • Change your iPhone device name by going to: Settings > General > About > Name
    • Pair up Bluetooth devices like Beats headphones, wireless speakers, and car hands free systems
    • Verify your loyalty cards are setup.  You may need to re-login to your online member accounts
    • Setup Apple Pay credit and debit cards
    • Sync any iTunes purchased ring tones and alert sound effects
    • Double-check that iCloud is setup the way you like by going to: Settings > iCloud
    • Corporate users will want to validate their Microsoft Exchange server settings
    The process of backing up and restoring an iPhone and Apple Watch can seem to take forever, especially when you are excited to start using your new phone.  Taking the time to follow these simple steps will get you up and running as quickly as possible can keeping all of your settings and data intact.
  • imac,  iphone,  itunes,  mac os x

    PSA: Don’t Forget to Re-enable iCloud Music Library Playlist Support on Your iPhone

    So, as you might have noticed,  I finally upgraded to a new iMac 27-inch with 5K Retina display recently.

    While cleaning up my data for the move from my 2009 17-inch MacBook Pro, I decided to switch the email assigned to my iCloud account.  No big, right?  Well, I haven’t had any of my iTunes playlists on my iPhone since I logged out of iTunes and back in.  Try as I might to figure out why my playlists wouldn’t sync, I was getting stuck.
    Until I decided to search the Apple support knowledge base for an answer.  (Article HT204406 fixed my problem.) Turns out that the problem had nothing to do with iCloud, wonky Wi-Fi connections or an alternate iCloud email address.
    No, the answer was 100% user error.  The fix, a simple one, was to just turnoff the “iCloud Music Library” sync option.  D’uh!
    Problem solved!
  • apple,  el capitan,  itunes,  mac,  mac os x,  mac os x server

    Apple Releases Mac OS X 10.11.4 Update, Other OS X Software Updates

    Following today’s “In the Loop” event, Apple has released a number of software updates for Mac OS X, including the El Capitan 10.11.4 Update, iTunes 12.3.3, OS X Server 5.1 and Apple Configurator 2.2.

    Mac OS X El Capitan Update 10.11.4

    New in “El Cap” is the ability to passcode protect notes stored in the Apple Notes app.  This feature addition is in-line with today’s iOS 9.3 system update which brings the same feature to iOS devices.  The Notes app also gained new sorting capabilities too.  If you are an Evernote user, or more correctly, an Evernote user looking to escape, Notes can now import Evernote files.  Evernote importing is a feature that Microsoft recently released for the PC version of OneNote with the help of an optional Microsoft OneNote plug-in.

    Also of note for Mac users is the addition of Live Photos being shared between OS X and iOS in the Messages app and AirDrop.  iBooks also received an enhancement that allows iBooks to write PDF files into your iCloud account – making the PDF files available to all of your iCloud connected OS X and iOS devices.

    iTunes 12.3.3

    iTunes 12.3.3 is a minor update that adds support for the new iPhone SE and the iPad Pro, the 9-inch flavor, to iTunes.  iTunes is the only cross-platform software update that is also available on Windows 7/8.x/10 PCs.

    OS X Server 5.1 and Apple Configurator 2.2

    Both, OS X Server 5.1 and Configurator 2.2 received updates that add new features to support the new Profile Manager and iPads with shared configurations.

  • apple,  ios 7,  itunes,  mac os x,  mac pro,  macbook pro,  windows

    Apple Releases OS X, Windows, and iOS Software Updates

    Earlier today, Apple released maintenance updates for OS X 10.9 Mavericks, iTunes 11.2, Safari 7.0.3, and the iOS Podcast app.

    The OS X Mavericks update, available now from the Mac App Store, is recommended for all customers running OS X 10.9.  For Mac Pro and 15-inch MacBook Pro with Retina display customers using 4K displays, Apple has added improvements for the new hi-resolution monitors.

    The update also includes Safari 7.0.3, bringing with it security improvements.

    Apple also rolled out iTunes 11.2 for Mac OS X and Windows PCs.  The latest maintenance release of iTunes brings with it enhancements for finding, playing, and managing podcasts.  In addition to iTunes 11.2, Apple also updated their iOS Podcast app to version 2.1.

    iTunes 11.2 and Podcasts 2.1 are available now from the Mac App Store (Macintosh), Apple Software Update control panel (Windows PC) and the App Store (iOS).

  • apple,  itunes,  mac os x,  windows

    iTunes 11.1.5 Update Now Available

    A day after rolling out the Mac OS X Mavericks 10.9.2 update, Apple today released the iTunes 11.1.5 update.

    A minor update for both Mac OS X and Windows PCs, iTunes 11.1.5 addresses an issue that can cause iTunes to crash unexpectedly when an iDevice is connected.
    You can download the update on OS X from the Mac App Store while Windows users can get the update from the Apple Software Update utility.
    The official release notes on the Apple website.
  • apple,  itunes

    Reflections on the Apple In Store iPhone Upgrade Experience

    This is a blog post that I’ve been meaning to write for a while now.  The following are my thoughts and experiences with the upgrade process from my iPhone 4S to the new flagship iPhone 5S smartphone at a local Apple Store.  Overall, I was pleased with the upgrade process, but in my option, there is still room for improvements with iCloud and the restore process.

    The Upgrade Experience
    Like many nerds, I upgraded my iPhone on launch day, September 20.  I don’t upgrade off contract every year, nor do I think I need to.  Surprisingly, this is my first iPhone upgrade.  When I became an iPhone owner, with the iPhone 4S, I was upgrading from the ill-fated Palm Pre.  I had to work on launch day so there was no waiting around for me in massive lines that are typical of an iPhone launch.  By the time I arrived at the store, the hoopla had died down to the normal flow of things and the overall shopping experience was a good one.  Luckily, the Apple Store I went to still had the iPhone I was looking for, a 32GB Space Grey iPhone 5S for Sprint.
    The upgrade experience went smoother than I expected and much quicker than the last upgrade experience from my BlackBerry Curve to Palm Pre at a Sprint retail store.  After a few short minutes of waiting for my iPhone to be called up from the back, the Apple Store employee verified my Sprint account status and the wireless contract portion of the upgrade was complete.
    While the backend “cellular” upgrade was happening with Sprint, I used iCloud to back up my iPhone 4S and when it was done, I powered it down.  The Apple employee seemed to be on autopilot and started to jump into the process of setting up my phone.  This is likely because the process was well rehearsed throughout the day, but again, being a nerd, I wanted to take over the upgrade.
    I powered on the iPhone 5S and ran through the welcome program and I was quickly setup and running.  The restoration of settings and data from my iPhone 4S came over easily enough and all of my installed applications began downloading and installing on my new phone without intervention.
    The restoration of my music and photos was a bit of a hassle, more so than I expected from Apple.  You see, hours later, after all of my apps reinstalled, the Settings app was still showing that the iCloud restore was underway.  I knew that a few photos were missing, but I couldn’t tell if any of my music was too.  Knowing that my photos were in Photo Stream and on my Mac in my iPhoto library, I killed the restore.  I really would like to see Apple clean up this process of iCloud backup/restore as this is not the first time I’ve seen this problem, and it was not unique to my phone.  I’ve seen the same issue on family and friends iPhone’s.  I never really liked killing there restore because I was never really sure, nor where they, that they had their photos backed up anywhere.
    To improve the process, I would like to see Apple add some kind of progress or status to the restore.  Additionally, if there where problems restoring data, what data it was, and then moving on to the next bit of data and then finally completing the restore.  I think there is more problems created when the restores are left open ended since you can’t start a new iCloud backup until the seemingly stalled iCloud backup completes.  In my experience, the restore never completes and the user is never notified.
    As a workaround to this issue, I recommend that if possible; backup your current iPhone to your Mac or Windows PC running iTunes and a sync cable.  I know that seems like crazy talk in some tech circles but it was save you the hassle at restore time.  Then, pick up your new iPhone, skipping the restore step and then sycing it with iTunes to reload your data.  An iTunes cabled back up/restore has never failed me upgrading my iPod touches or iPads.
    All-in-all, the retail shopping experience at the Apple Store, as compared to a wireless carrier or big box store, was far superior.  The actual transfer of service from old phone to new phone was pretty painless also.  I just wish that the iCloud backup and restore went smoother than it has been my experience in the past.  Results will vary and I hope you enjoy your new iPhone.
  • apple,  ios 7,  ipad,  iphone,  ipod touch,  itunes

    Apple Posts iOS 7.0 and iTunes 11.1 Updates

    A short while ago, Apple posted the General Availability, or “GA”, versions of iOS 7.0 and iTunes 11.1.

    Before upgrading, we encourage you to read our Getting Ready for iOS 7 guide.

    You can download iOS 7.0 to your iDevices by navigating to Settings > General > Software Update and clicking the “Download & Install” button.  The 768MB installer package will download and install.  The download times will vary depending on the speed of your device’s Internet connection.

    You can also download the latest release of iTunes, version 11.1, from the Mac App Store, Apple Software Update on Windows PCs, or from the Apple iTunes website.