In the final installment of my Apple IIGS Welcome-Home-Athon video series, I talk about the various solutions I tried to get the GS working with a modern LCD display and see what it was like to use System 6.0.1 and Zany Golf on a color display.
-
-
Welcome Home Apple IIGS – Part 2
In this second installment of my Apple IIGS Welcome-Home-athon series, I work on testing out video output, booting up GS/OS 6.0.1, verify the RAM configuration, and check which ROM my little guy has. The RetroComputing Shenanigans Bus also takes us on a short trip to Dongle Town!
-
Looking Inside a Recent Apple //e Purchase
I wonder what cards are inside this Apple //e? The Apple //e was my first Apple-branded computer. My first computer was an Apple II-series clone, the V-Tech Laser 3000.
As I am slowly working on restoring my main Apple //e, I’ve been buying other machines to pick up various parts that I need. For example, the second Apple //e that I purchased came with an Apple DuoDisk drive and an Apple Monitor II.
For purchase #3, I am on the hunt for expansion cards. Specifically, the Apple Mouse Interface card.
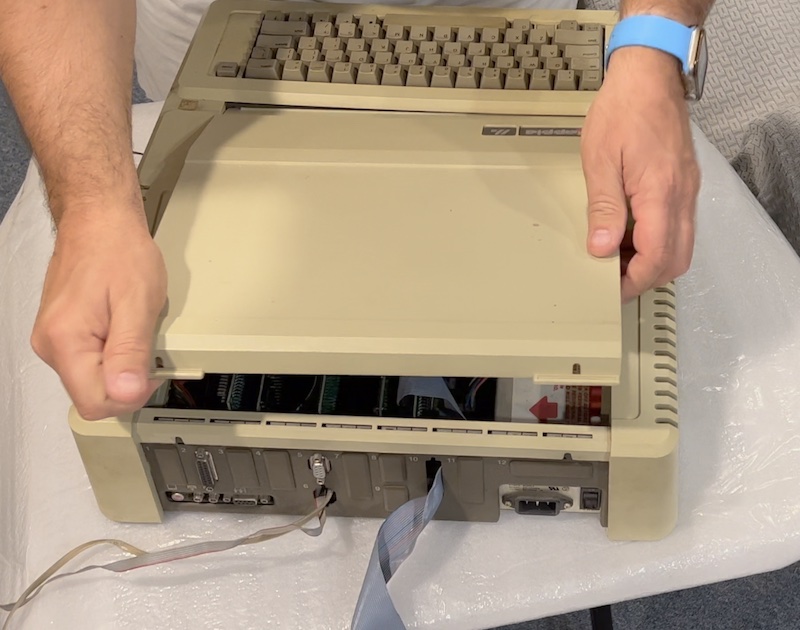
Here’s my vintage Apple //e unboxing video and a first look at the cards inside.
-
Booting an Apple //e from a Disk II Floppy Drive
After buying a replacement Apple //e earlier this year, I wanted to find and Apple Disk II Controller Card and at least one Disk II 5.25″ floppy drive.
It took me a while to find a reasonably priced used Apple Disk II controller card and Disk II floppy drive on eBay. The card and drive needed a good cleaning before I tried to use them. While there was dust in the floppy drive, the read/write head was still remarkably clean. The card had a bent pin 1 on the drive 1 connector. I carefully bent it back into position. I used 70% Isopropyl Alcohol to clean the card and some DeoxIT D5 in the Apple //e’s expansion slot to ensure a good contact between the card and the computer.
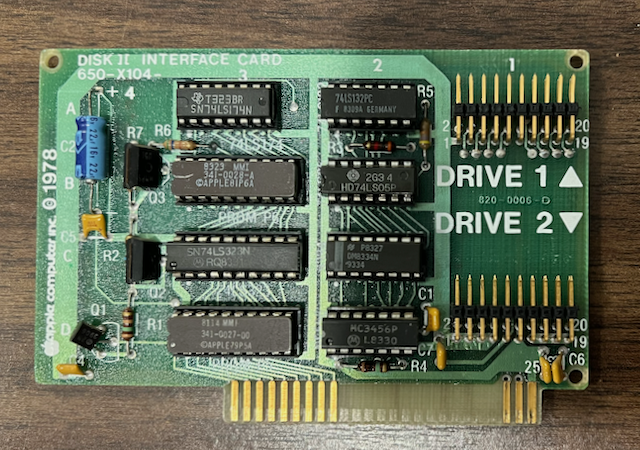
Apple Disk II controller card 
Apple Disk II 5.25″ floppy disk drive (1978) 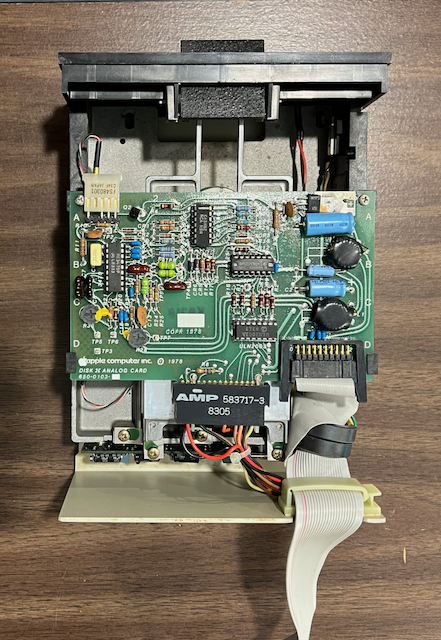
Disk II with the case removed, showing Woz’s custom disk drive analog board One thing that I did learn was that I was unable to have both a Disk II controller card and the newer Apple I/O controller card, for use with the Apple DuoDrive, in the same machine. To get my Apple //e to boot from the Disk II controller card, I had to remove the Apple I/O controller card before the computer would boot properly. While you apparently can’t mix and match these two types of 5.25″ Apple controller cards, you can have two Disk II or two Apple I/O controller cards installed at the same time. Just not one of each. In my experience using the //e back in the mid-1980s, you either had two Disk II drives or a single DuoDisk drive. You never mixed the two systems.
Disk II History
The Disk II system for the Apple II, II+ and the //e offered users improved data transfer rates over cassette tape-based storage systems and allowed for the direct access of a file by name, according to the 1982 version of the Disk II Installation manual.
According to the Disk II article posted on Apple2History.og, Apple CEO Mike Markkula wanted a faster way to load programs on his Apple II. Steve Wozniak set out on the task of creating a custom disk drive controller board. Steve Jobs brokered a deal with Shugart Associates to sell Apple stripped down versions of the SA-400 disk mechanism.
The Disk II Floppy Disk System, consisting of a Disk II controller card and a Disk II floppy drive, was made available for pre-order at a cost of $495 in June of 1978. Once Apple started shipping the Disk II, the price increased to $595.
A single Disk II controller card was able to drive up to two floppy drives. The drives received power from the controller card which is plugged into an expansion slot on an Apple II-series motherboard.
Early versions of the Disk II system were able to store up to 113.75 KB when using Apple DOS 3.2.1 and earlier. With Apple DOS 3.3, the version of DOS that I use with my Apple //e computers, Disk II was able to write 140 KB disks. Apple provided a 13 to 16-sector conversion utility to upgrade disks for use with newer versions of Apple DOS.
-
Early iPod Charging PSA
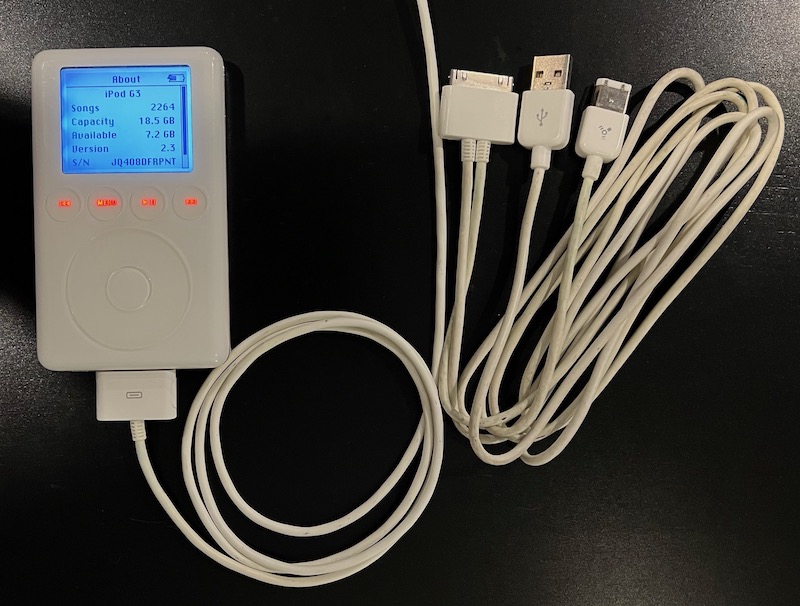
Apple iPod with Dock Connector (2003) and dual FireWire (charge) / USB-A (sync) cable This Public Service Announcement (PSA) deals with early generation iPod music players. If you own a first generation iPod with Scroll Wheel (2001), a second generation iPod with Touch Wheel (2002), or third generation iPod with Dock Connector (2003), you need the FireWire charging brick and a FireWire to Dock Connector cable or the FireWire/USB-A to Dock Connector dual-headed cable. The combo cable was pretty crazy: You connect the FireWire end into the charge brick and the USB-A end into your Mac or Windows PC so you could sync and charge your iPod at the same time.
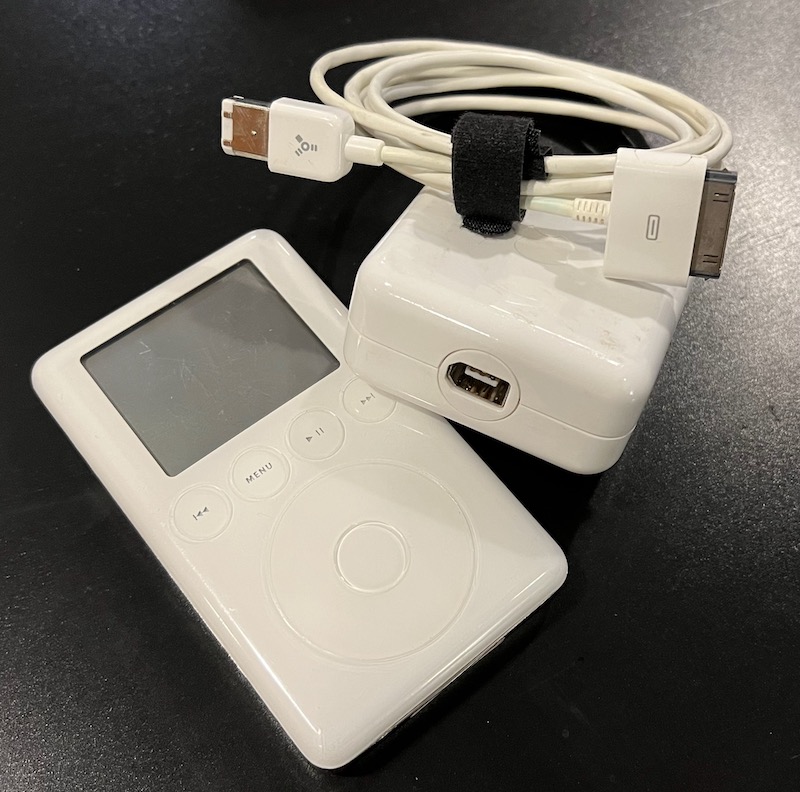
Apple iPod with Dock Connector (2003) with FireWire Charger and Cable When Apple announced that they were retiring the last iPod, the 7th Generation iPod touch from their product line up, like many of you, I pulled out my old “Classic” and “Touch” iPods to take a stroll down Memory Lane.
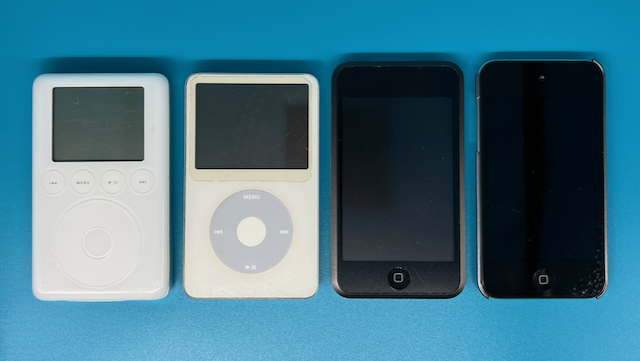
Apple iPod with Dock Connector (left), iPod Video, iPod touch 1st Gen, iPod touch 6th Gen In my May 11 iPod look back, I was trying to charge my third-generation iPod with Dock Connector, I was doing so from an Apple USB-A charging brick. It wasn’t until I pulled out my FireWire charger and cables was I able to wake up my oldest iPod from it’s slumber.
-
Mac SE Restoration Reassembly Video
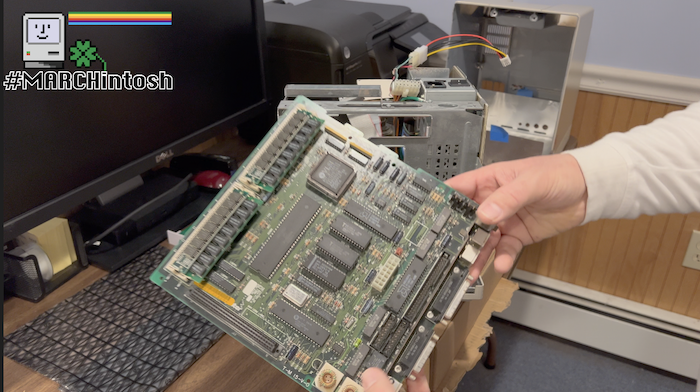
Mac SE motherboard, source: A. Grassia A few weeks ago, I learned of a retro computing community event called #MARCHintosh. I decided to turn my Macintosh SE restoration project into a #MARCHintosh2022 video. I had been toying around with the idea of making a video – something that is outside of my comfort zone – and post it. You can watch in on YouTube now.
I think the hardest part about the restoration project was to get two working Sony 800k floppy disk drives. I needed to disassemble, clean, grease and lubricate the drives. Something that I have never done. If you are used to working inside a computer, you will be able to handle a floppy drive restoration project of your own. While I didn’t film any footage of my floppy restoration efforts, there are several good videos already on YouTube that do a much better job of explaining the entire process from start to finish.
Overall, I am very happy with how my Mac SE restoration project went. I chose to reconfigure my Mac SE as a two floppy drive model. It is unclear to me if my second-hand SE came from the factory as a two floppy model or as a FD/HD model that more common in the late 1980s. New hard disk replacement options, including the SCSI2SD bridge board allowed me to install the double high two floppy drive cage into my Mac while still being able to tuck the SD card to SCSI bridgeboard away inside the case giving me the best of both worlds: an unusual dual floppy Mac SE with a SCSI “hard disk”. I was happy to remote the third-party Microtech faceplate and MFM hard disk. It has been interesting to relive what it was like to use System 6.0.8 as an operating system. So much is the same, and yet, so much is different at the same time. This has been a fun and nostalgic project to have worked on.
I think by comparison, making the video was equally as challenging. Calling me an amateur YouTube video maker is a generous categorization of my skills. I am glad I made the video. I feel like each one is better than the last. Practice makes perfect, as the saying goes, but better use of the iPhone camera, microphones, lighting, and a good backdrop don’t hurt either. I’m sure that I will try making a few more shorter unboxing style videos and a follow up Apple //e video in the future.
-
Yellowstone Universal Disk Controller Now Available
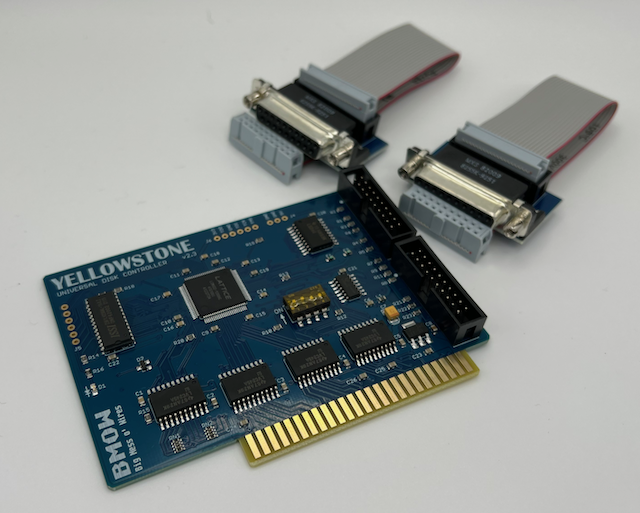
BMOW Yellowstone Everything Bundle, Source: A. Grassia Big Mess O’ Wires (BMOW) has begun selling their new Apple II-series universal disk controller card, the Yellowstone Universal Disk Controller.
Yellowstone is a new disk controller card that can be used by retro computing enthusiasts in their Apple II-series machines, including Apple and clone machines, with an array of 5.25-inch and 3.5-inch disk drives from the 1980s. Further, Yellowstone also supports BMOW’s own Floppy Emu disk emulator and naked Macintosh 800k and 1.44MB drives.
Yellowstone is a universal disk controller card for Apple II computers. It supports nearly every type of Apple disk drive ever made, including standard 3.5-inch drives, 5.25-inch drives, smart drives like the Unidisk 3.5 and the BMOW Floppy Emu’s smartport hard disk, and even Macintosh 3.5-inch drives. Yellowstone combines the power of an Apple 3.5 Disk Controller Card, a standard 5.25-inch (Disk II) controller card, the Apple Liron controller, and more, all in a single card.
I am excited to have received my Yellowstone card this week because I also received a second unenhanced Apple //e. (Have I mentioned that I have a deep fondness for my first Apple computer?) I plan on using the Yellowstone card in one of my //e’s as a way to get 3.5-inch disk drive support since finding new old stock 5.25-inch floppy disks is a bit difficult.
I ended up ordering the “Everything Bundle” ($169). This bundle, as the name implies, includes the Yellowstone universal disk controller card ($139) and two DB-19 female disk adapters ($19/ea) so that I can connect two sets of drives to a single computer at a time.
My end result could look something like an enhanced Apple //e with the DuoDrive and the BMOW Floppy Emu connected for easy image-to-floppy creation or to archive the original floppies in my small collection. Another configuration that I am looking forward to trying is connecting my Apple 5.25″ drive and a Macintosh 800k floppy drive to the same system to make a bootable floppy disk with a few different programs on it.
And that is what makes these new cards for old computers so interesting – you can mix-n-match new and old parts to extend and customize the Apple II-line just like Woz intended.
-
Installing and Archiving FileMaker Pro 2.1v3
I have been in the IT field for over 25 years now. Interestingly, one of the applications that I have used almost daily for that entire time is Claris FileMaker Pro. Over the years, the company name changed from Clairs to FileMaker and back to Claris again. The one constant is that FileMaker has always been FileMaker.
As a help desk technician, I deployed and supported FileMaker Pro on Macintosh and Windows PCs. As a server admin, I deployed, managed, and upgraded FileMaker Server and the databases they contained.
So, it is only natural that when restoring a Macintosh SE with System Software 6.0.8 installed, that FileMaker Pro 2.1v3 be installed to go along with it. The Disk Copy floppy disk images that I found were either of 1.4MB floppies – which my SE can’t read – or 800k floppies that did not work for one reason or another (i.e.: corruption or a bad image file).
I ended up purchasing an original copy of FileMaker Pro 2.0v2 on a set of four 800kb floppy disks from eBay. Then, I found and downloaded the 2.1v3 updater from a University of Michigan software archive. With a working set of disks and the 2.1v3 updater in hand, I was able to install FileMaker on my little vintage pal. Using a Power Macintosh 7200/120 with a 1.4MB Apple SuperDrive, I created my own disk image archive in Disk Copy 4.3 and 6.3.3 formats suitable for use on vintage hardware like mine, or in a Classic 68k Mac emulator.
-
Restoration Projects Update
Back in December (2021) I posted a picture on Twitter of a pair of Mac SE compact Macs and a Power Macintosh 7200/120.
They were part of my Christmas break project to occupy my time while on vacation. A nerds gotta nerd.
I also picked up an Apple //e. And, a Mac mini.
So, I figured now is a good time to give an update on where these projects are.
Mac SE Rebuild (January, 1987)
My first Macintosh was the Mac Classic (1990). It was a great machine to have, and it felt like the natural, albeit without color, extension of my Apple IIgs and GS/OS. A few years later, once I got into the workforce, I was introduced to the Mac SE, the machine that the Classic was based on. I thought that it and the Mac SE/30 looked so cool with its Snow White design language. When I decided to do a rebuild of a compact Mac, the SE was the perfect choice since it represented my nostalgia for my Classic and a timeless classic of the compact Mac era from Apple’s history.
The picture shows two Mac SEs because the first one was damaged in shipping and became the donor parts machine for the second, which was in better external shape.
The case of the SE is cleaning up very well. I have used many cotton swaps, wipes, and IPA. Likewise, the motherboards cleaned up well also. I cut out the PRAM batteries before they leaked.
The biggest problem is restoring the floppy drives. The three Sony 800kb floppy drives that I have need to be stripped down, cleaned, greased, and lubricated, and work needs to be done to carefully work on and clean the eject gear mechanism. This is clearly the most difficult part of the restoration.
I believe that my Mac SE rolled off the assembly line as a dual 3.5-inch floppy drive model because it came with a third-party Microtech spacer in the top floppy drive position. On this project, I want to put the SE back into that configuration. I will be ordering the bracket that is used to secure two floppy drive cages together. With an open source BlueSCSI microSD card to SCSI interface board. When reassembled, the BlueSCSI board should sit nicely on top of just behind the stacked floppy drive cage.
Apple //e Enhanced (March, 1985)
As we saw in my welcome home video, the Apple //e is really good shape. At some point, I’ll need to remove the motherboard, clean it, and then reinstall a replacement set of plastic standoffs and screws. I’ll wait to do all of that work until I find the parts I’ll need.
The //e is working fine, and it has pasted its built-in diagnostics test (hold down both Apple keys and then power the unit on). I can keep using with a Dell LCD monitor and my Big Mess of Wires Floppy Emu. While I don’t have my first Apple //e anymore, I do have the 5.25-inch disks that came with it, and I would like to connect a pair of disk drives to it. The card that is installed in my current //e uses the newer I/O Controller Card and connects to a DB19 disk port. I will be placing an order for a refurbished Apple 5.25-inch Apple 5.25 Drive (A9M0107). It will let me use my old disks again to boot up the computer. the I/O Controller Card can also be used with a Duodisk Drive. I liked it because it seemed to be more compact and had a spring loaded eject mechanism. My original //e had a Disk II controller card and a pair of Disk II drives. If I can find a working card and drives at a reasonable price, I would buy them. I didn’t know this at the time, but the Apple //e could use the 3.5-inch floppy drive that I had with my Apple IIgs. The //e needed an Apple LIRON disk controller card. Those cards are a bit hard to find on eBay, however, Big Mess of Wires has developed Yellowstone – a universal Apple //-series drive controller card. Think of it as one modern disk controller to rule them all.
Power Macintosh 7200/120 (April, 1996)
Of the current restoration projects, the Power Mac 7200 needs the least amount of work. It is running fine as is. I did run across an eBay vendor who had two 512kb VRAM (video RAM) chips at a reasonable price. The 7200 has three VRAM slots on the motherboard. With the two new chips, I’ll have 2MB of VRAM and will have filled all three slots. Nice.
Looking ahead to other components, I may pick up a period accurate keyboard. My recollection of the Apple Design Keyboard was that it was supposed to be a less expensive all plastic replacement for the fan favorite Apple Extended Keyboard II. That wasn’t even a contest. I held on to my Extended II at work for as long as I could. I still have one, but I only use it sparingly as I am worried about RSI issues from prolonged use.
If the original Quantum Fireball SCSI hard disk fails, I will switch to either a SCSI2SD or BlueSCSI board. The only other upgrade that I might to do the 7200 is to install a PowerPC G3 accelerator card. At some point, my 7200 had one, as the third-party upgrade badge sticker was affixed to the front of mine. Since the card was removed, I removed the badge. I feel that installing Apple upgrade kits keeps the purity of the computer. I still haven’t made up my mind about third-party accelerators. In my past experience, they seemed like more trouble than they were worth requiring that you follow a maddeningly specific OS and extension software recipe to keep it running well.
Mac mini (Mid-2011)
While old, I wouldn’t call my recently acquired Mac mini “vintage”. This wasn’t a restoration either. Think of it as recycling an old PC by giving it a new purpose. In my book, saving old equipment from a landfill is a noble cause.
I wanted to build a home server to host selected videos and music that I purchased over the years from the iTunes Store. Yeah, I know I can just stream purchases from Apple’s server, but I grew up in a time when you had to pay for your bandwidth, and I remember what some of my monthly America Online and Verizon bills looked like. So, when possible, I like to stream video and music across my home network.
With that in mind, I upgraded the RAM on the Mac mini to 16GB using a Crucial memory upgrade kit. Then, I installed a fresh copy of Mac OS High Sierra 10.13.6 and the corresponding Mac OS Server 5 software that I had previously downloaded from the Mac App Store. Sure, it’s not the newest or fastest computer on the block, but it was dirt cheap. The mini and the memory upgrade, all in, was just about $200. I connected an extra USB 2TB RAID box for file serving and downloaded iTunes content. Boom! Home server on the cheap.
Future Projects
Once I get the Mac SE and the //e fully restored and running again I plan to take a break from restore projects. I have learned a lot from these projects so far and I’m sure that there is still more to (re)learn from using and enjoying these machines again.
As the weather turns cold again in the fall, the hunt will resume for more machines to restore or rebuild. My short list includes a Macintosh IIci, a Mac SE/30, and an Apple IIgs. If I happen across an Apple //+, Apple //c or //c Plus, Mac Classic, II-series, or Quadra 840av, well, I’ll probably scoop them up to be stored for refurbishment at a later time.
-
Apple /// Plus, Lisa 2, and the Macintosh XL
This weekend, I learned of a pair of Apple computer models that I didn’t know existed before.
As an Apple fan, I knew about the original Apple computer, the Apple // series, the Apple ///, the Lisa, and, obviously, the Macintosh line.
I was surprised to learn was that were two Apple computers that I didn’t realize existed before this weekend: the Apple /// Plus and the Lisa 2.
You can be excused, if like me, you have no recollection of either of these two niche machines.
Apple /// Plus
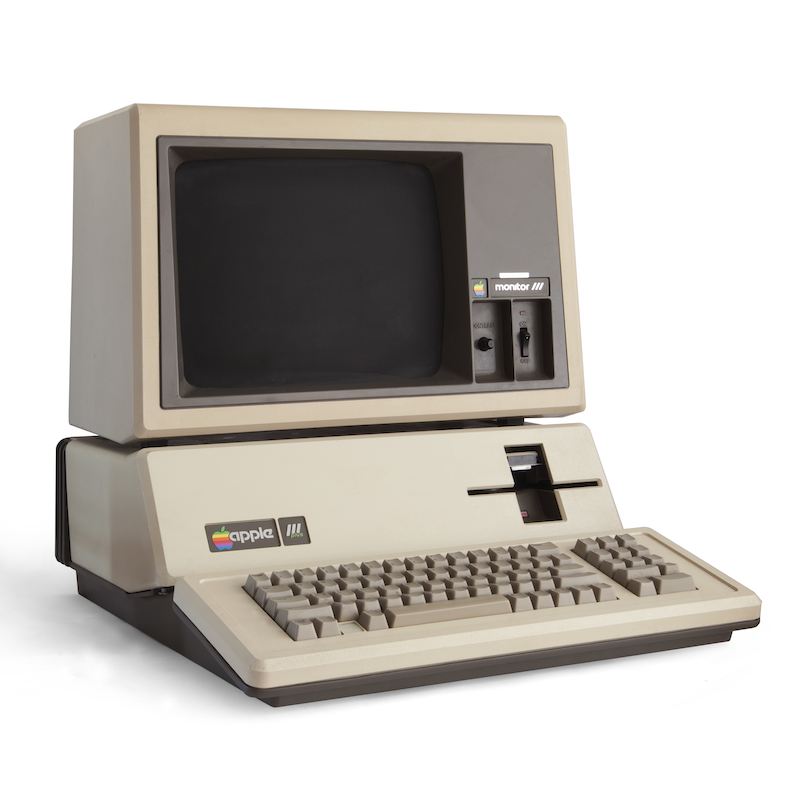
Apple /// Plus, Source: Wikipedia.org The Apple /// Plus, released in December 1993, just a month before the original Macintosh, with a base price of $2,995 according to Wikipedia. The original Apple /// suffered from overheating and ran afoul of FCC regulations relating to the about of radio-frequency interference. As a result, Apple was required to make adjustments to the Apple /// and rebranded the revision as the Apple /// Plus. Owners of an original Apple /// were able to purchase upgrade kits, including logic board upgrade kit and a keyboard upgrade kit that included a new keyboard and encoder ROM, and a new faceplate badge. These upgrades needed to be installed by an authorized repair technician.
Apple Lisa 2
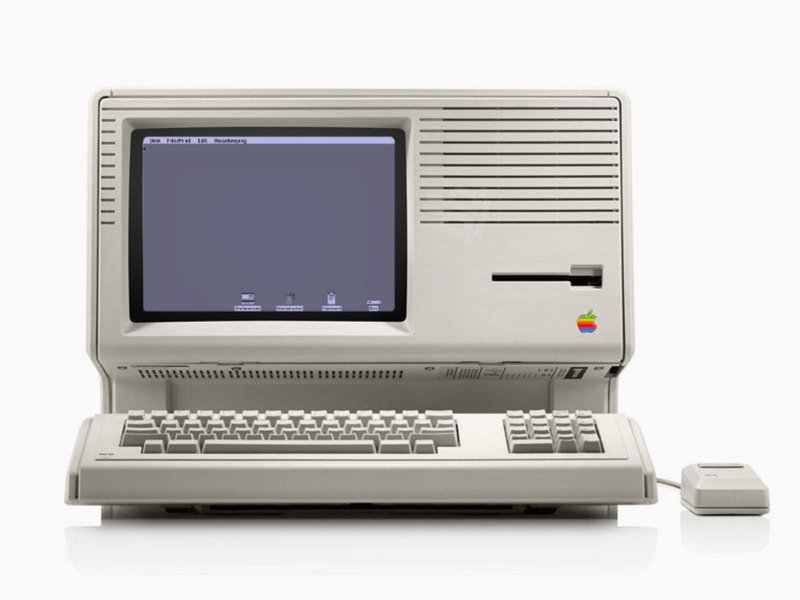
Apple Lisa 2, Source: iFixIt The Apple Lisa 2, released along side of the original Macintosh in January 1984, was a revision to the Lisa. Lisa 2 switched from the Apple II-style Twiggy 5.25-inch floppy disk drive to the same Sony 400KB 3.5-inch floppy drive used in the original Macintosh. Other upgrades included boot and I/O ROM replacement chips, and had RAM options of 512KB, 1MB, or 2MB. With the Lisa 2 having been released one year earlier, Apple offered free upgrades to the Lisa 2/5 – a Lisa 2 with a bundled 5MB hard disk. As with the Apple /// Plus, the Lisa to Lisa 2 upgrade needed to be done by an authorized technician. Lisa 2 PCs remained on sale until August 1996. The last version of the Lisa operating system was known as Lisa Office System 3.1.
Apple Macintosh XL
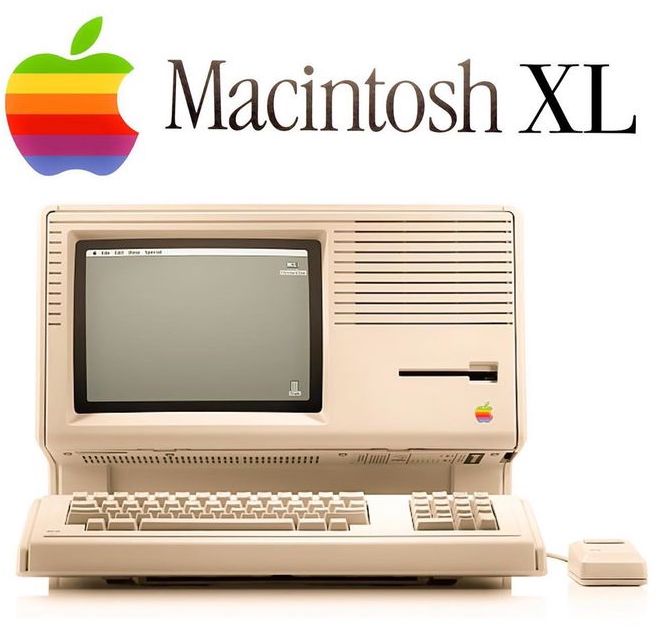
Apple Macintosh XL, Source: PinImg.com A year later, in 1985, the Lisa 2/10 configuration was rebranded as the Macintosh XL. As with the original Lisa, the Lisa 2 was given an upgrade kit that changed some of the internal hardware and software. Upgraded Lisa 2s were then able to boot into Macintosh mode, running a version of the system software known as MacWorks XL (with Macintosh System Software 1.1 support). The Macintosh XL’s final system software version was MacWorks Plus II (with support for Macintosh System Software 7.5.5 support).
Unlike it’s siblings, the Lisa and the Lisa 2, the Macintosh XL was on sale for just four months, launching in January 1995 and then being officially discontinued in April 1985. It would be eight months before Apple released it’s next all-in-one compact computer; the Macintosh Plus.